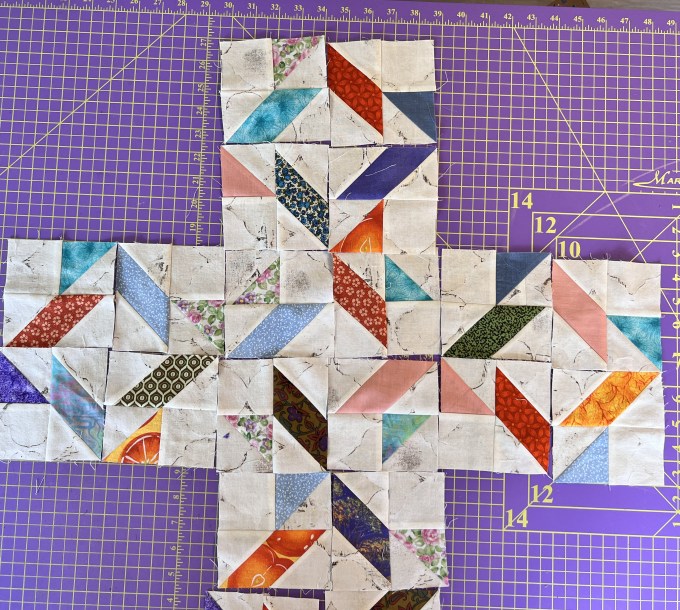
Finishing the Whirlpool quilt

When I left you yesterday I had finished piecing all of the blocks for the Whirlpool quilt top.….

….so now it was time to put it together.

I laid all the blocks up on the design wall and stepped back to see if I saw anything that needed to be changed…..

The fun thing about making a scrappy quilt like this is that you usually don’t have to worry about block placement!!

Once they were all lined up, I pulled out my Numbered Pins and marked the top, starting with #1 at the top left corner, adding #2, 3, and 4 to the first row, and coming back to the left (2nd row) for #5…

Obviously, these were the leftmost blocks in the 3rd and 4th rows.

When using these pins, I always point the pin to the left side of the quilt.

That way, when I pick, up two blocks to sew together, I can easily tell that I have them in the correct orientation…..

Both pins are pointed to the left and the #2 pin is on the right.

They say that confession is good for the soul so here goes…..

When I pieced the above two blocks, I sewed on the wrong side and they ended up reversed!!!

Since it really didn’t make a difference, I left it alone!!

Because of having the positions marked with pins, I was able to take ALL of the blocks off of the wall and sit down at my machine without having to jump up as often.

Very quickly, the top was together and, after a bit of decision making, the borders were added and the top was finished…..

One of the things that I wanted to accomplish with this top was to practice piecing accurately and, for the most part, I am very happy with the results
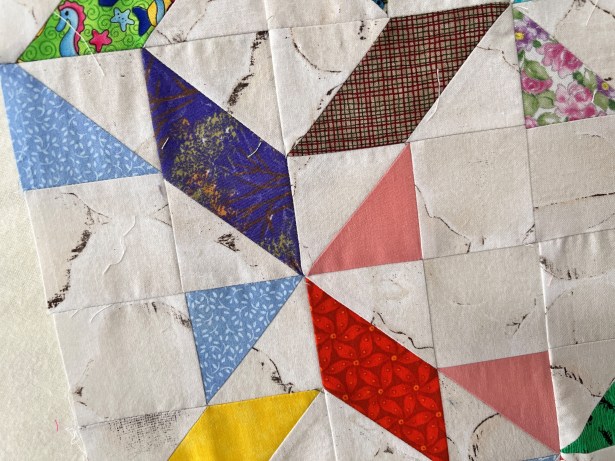
Having said that, I am not exactly sure what happened to these two…..

Since this is a charity quilt, I am not going to re-do the areas, but it was interesting to see that I could also make BIG mistakes!!!

One final thing…..

When I was using the sew-and-flip method of making the diamond blocks, I added an extra line of stitching and ended with these extra half-square-triangle blocks…..

I will EVENTUALLY trim them down to 1.5-inch blocks, but for now, I just added them to my 1.5″ drawer……

This sits by my machine, just in case I get the urge to start a “Leader/Ender” project!!

Since they have been there for several years, it doesn’t look promising!!!

Caught in the Whirlpool…

A little while back, I posted about the planning and calculations for making a quilt using the “Whirlpool” block…..

The block is made up of four sets of identical quarters and it was quick work to sew them together……

…..especially after I figured out the masking tape hack that I talked about in a previous post.

I was trying to be very careful with the points and was pleased with the results.

I finished about 2/3rds of them in one sitting and then came back the next day to do the rest. This particular point is important because of the next photo!

One of these things is not like the other……

YES….. I pieced 1/3 of them WRONG!!

I HOPEFULLY laid them out with the two different blocks alternating but it did NOT have the same look…..

So it was time for me to do some ripping……

A LOT of ripping!!

Eventually, I got them fixed and was able to start piecing the bits together…..

At the end of the day, I had 20 CORRECTLY PIECED blocks ready for the top…..

Come back tomorrow for the finish and also a critique of the piecing…..

The Painter’s Tape Solution

In yesterday’s post, I described my newest piecing project…. a charity quilt using the “Whirlpool” block…..

I did make one change in the piecing layout. Instead of piecing the diamond blocks as two half-square triangle squares, I decided to piece them as one unit made up of a rectangle of the scrap fabric and two triangles of the background fabric…..

I was piecing these using the “snowball” technique where you place a background square at the end of the rectangle, sew on the diagonal, and press the resulting triangle over to finish the rectangle.

BUT, I was having trouble getting my lines to be straight!!

After some thought, I figured out a solution……

After I figured out how to position the tape, it was fast and easy to finish piecing the 80 required rectangles and get on with the design.

What would quilters do without Painter’s Tape!!!!

Do you have a favorite trick for using this special tool??

I HAD to piece!!

This past weekend, I realized that I NEEDED to do some piecing!! For the last few weeks, I have been sitting at Julio (my JUKI sit-down long-arm machine) doing thread painting and quilting.

I needed some time with Juanita (my JUKI home machine)!!

The week before, I had visited our guild Charity Bee and had picked up a stack of 185 six-inch squares…..

Yes….there is quite a variety there!!

I started looking for patterns and stumbled upon a pattern from “Theresa Down Under”

….and focused on the “Whirlpool” block…..

I did make one change to the design….. Instead of making the “diamond” units in two pieces (2 half-square triangle blocks), I chose to use one rectangle with the “snowball” unit on each end.

I decided to make the blocks 8-inches and to set them in a 4×5 format.

Now it was time to figure out exactly what I needed to cut.

I do this planning in three different parts.

First, I count the number and size of FINISHED units for each BLOCK…

Note that the 8 Background squares on the last row will be used to finish the corners of the print rectangles.

NEXT….. I plan the CUT sizes for each of the pieces…..

At this stage, I note how many I can get from each strip of fabric or 6-inch square.

Finally, I multiply those numbers by the number of blocks…..

AND, I have finally learned to calculate the background yardage needed……

Before I started making this last calculation, I would often run out of background before I finished the quilt!!!

I picked out the 40 squares that I would need and added a background fabric……

I chose to use my Accuquilt to cut most of the background pieces, starting with the 2.5-inch strips…..

Then I folded each strip and sub-cut it into 2.5-inch squares……

This was SO fast and within a short time I had all of these cut and ready to go……

Now it was time to cut the squares up into the needed pieces. Since I needed a series of rectangles that were 4.5 x 2.5-inches, I placed the squares on the Accuquilt and cut them into 2.5-inch strips…..

It was easy work to trim them to 4.5-inches….

So, everything is cut and ready to go…..look out Juanita……here I come!!!

Help….I need a good name

Doesn’t it feel good to finish a project that has been years in the process??

YES, I finished this quilt last week…..

For those who may not remember, it was inspired by this photo….

I used “Electric Quilt” to design two blocks…..

I then played with them to come up with this design…..

When I received a bunch of gorgeous blue and green hand-dyed fabrics, I knew that it was time to start piecing!! The top has been ready for 18 months but it took this long to figure out how to quilt it!!

After readers gave tons of ideas, I decided on straight lines following the basic design of the triangles. That is a LOT of straight lines!! Let’s just say that I am now perfectly comfortable using a straight ruler for quilting!!

BUT WHAT WOULD I DO DIFFERENTLY????

I enjoy looking at each quilt and thinking about how I could make it better the next time, and for this quilt, there are TOO many lines of quilting. I like my general idea of having the large triangles run into each other…..

BUT, I should have had the spacing of the in-between lines be further apart!!

Live and learn!!

Having said that, I do like the look of the quilting, especially from this angle…..

I have written the pattern for this quilt but need a name before I can publish it.

PLEASE HELP……WHAT WOULD YOU NAME IT???