Welcome back to “I HATE PAPER PIECING”…..not really!!
In yesterday’s installment I talked about the tools that I simply cannot do without…..Golden Threads Paper and Add-A-Quarter Ruler.
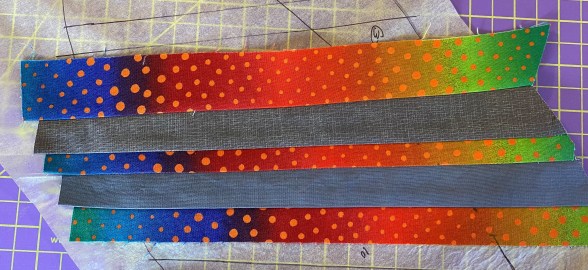
Today I have selected my fabrics and am getting the pieces prepared.
This video talks about one of my paper piecing horrors…. selecting a fabric, sewing it to the base and then flipping it over to find that it is TOO small!! I have added a step to hopefully alleviate this problem.
Yes, this title is a bit tongue-in-cheek because I REALLY don’t enjoy paper piecing!!! However, when there is a design that you want to do and you HAVE to paper piece it…..you put on your big girl pants and get down to it!!!
The culprit in this case is this tree…..
…and I want to make TWO of them to decorate my entryway!!!
Since I was having SO much fun with paper piecing, I thought that I would share my enjoyment with you!!!
This is the first of three videos that will detail MY method for paper piecing. In this one I talk about my two favorite tools for this technique….Golden Threads Paper and Add-A-Quarter Ruler…
Come back tomorrow for part 2….preparing the the fabric pieces
Yesterday I had one of the sides finished and was excited to see how the next side would work. Here is the process that I used to piece each side…..
First, I drew the design using “Golden Threads Quilting Paper”.
It is thin and easy to see thru for tracing a pattern and super easy to tear off after the fact. I also like that it won’t tear if you have to rip out and re-do…..ask me how I know!!!!
Anyway, here is the pattern drawn out…..
When I drew out the first side, I made the decision that, since the lines themselves were so wide, I would use the outside of the line as my design. This meant that the colored sections were a bit wider but I think that it worked well.
Here are the steps to paper piecing….
Line the fabric up with the previous piece that was already sewn in place, matching the marking to the circular line…..
I normally don’t pin but since these seams were long, I opted for a few pins along the way….
Now I turn the piece over and sew on the reverse side, following the drawn line….
Iron the new piece out…..
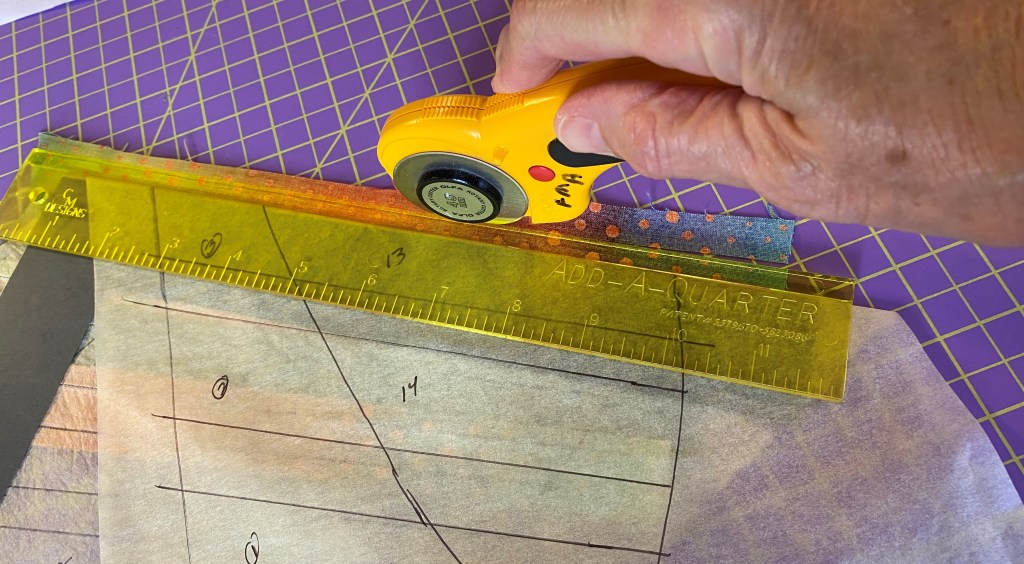
And then comes the magic….
I used a straight edge to fold the NEXT piecing line over……
Placed the “Add-A-Quarter” ruler over it…..
…..and cut along the added quarter inch…..
The result is that now I have a good line to follow when I place the next piece!!
This ruler makes Paper Piecing SO much easier and I will do a review of it in the next day or two!!
As the night wore on, I made a few mistakes, including piecing from the wrong side of the paper…..
….meaning that everything was reversed!! Fortunately I only did THREE seams this way!!
At one point, I used two grey fabrics together instead of moving to the next in the gradation. I will honestly say that I debated long and hard about whether I wanted to rip out those FOUR seams to fix it, but in the end, I did just that.
Sometime around 11:00pm I put the final stitch in the side and laid it out on the wall to see how it looked…..
Yowza!!!
Needless to say, I went to sleep happily dreaming of firework stripes!!!
The final step will be to join the three pieces. I have always been thinking about applique, but maybe I should try piecing???? I will have to think about that!!!