I HATE to wind bobbins, especially when I am in the middle of a project and have to stop and unthread everything.
I have recently been hearing people talking about pre-wound bobbins and my initial, frugal reaction was “why would I want to spend money on those?”
THEN, I started thinking about the fact that I would have been paying money for the thread anyway, and what I was saving was TIME, and we all know how valuable IT is!!
So, I relaxed my purse strings and purchased two sets of Pre-wound bobbins for Julio, my Juki Sit-Down long arm……
I loaded a cream-colored one into the bobbin casing and started quilting……
Okay….the top looks GREAT!!!
But the BIG test is how the back looks…..
WOW….even on this loose-weaved practice fabric, the tension looks amazing.
Like most quilters, I cannot live without my rotary cutter!!
But even more than that, I love the story surrounding my first rotary cutter…….
Let me set the stage for you…..
It is December of 1985 and my husband and I have traveled from Canberra Australia and are visiting our parents in Abilene, Texas. And, more importantly to them, we have a 6-month old grandson in tow!!
My ever-resourceful Father bought us a Polaroid camera and said that he wanted to be a member of the “picture of the month club”!! The idea is that we would mail one photo each month so that he could see his grandson grow up. Remember, this was LONG before the digital age!!!
The day before we left to return to Canberra, Dad took me to a discount store to purchase more film for the camera. As we walked past the craft department, a package similar to this one caught my eye…..
….except that the rotary cutter was smaller, the mat was skinnier and there was a 4.5-inch plexiglass ruler included.
Needless to say, I was intrigued!!!!
Dad saw my interest and immediately picked it up and put it in our basket!!
I found a place to tuck it into the suitcase and happily carried it home.
It took another few years before I REALLY learned how to use it and, amazingly I still own the original cutter……
….although it is now designated for “paper use only”.
It was typical that my Dad saw my interest and jumped in to encourage me….that is just who he was!!!
The other day I stopped to fill a bobbin and this is what I saw when I started to put it back in…..
Then I took the needle plate off and…..
I am normally SO good about keeping my machine cleaned and oiled and I don’t know what happened here!!!
Do you have a method to remind you to keep everything maintained? If so, PLEASE share it with me!!!
Did you know that many tools from your kitchen can move to your studio, making your quilting even more fun? To receive a free pdf featuring 5 such tools, please subscribe to my newsletter. You can sign-up in the top, right-hand column of this blog, or clickHERE
Last month I put out a plea as I was looking for an iron that would get hotter than the one that I had.
I thought that getting a higher wattage iron would help and, after doing some research, I purchased this 1800 watt iron…..
It is a nice iron and it gets hot fast, but it really isn’t any hotter than my normal iron!!
Then it dawned on me that the wattage won’t make it hotter but the temperature setting WOULD!!
So, I returned to my favorite iron….
….and simply bumped it up one temperature setting!!!
And….voila….I had just what I was looking for!!
So the new iron went back to Amazon and I am enjoying my old iron even more!!
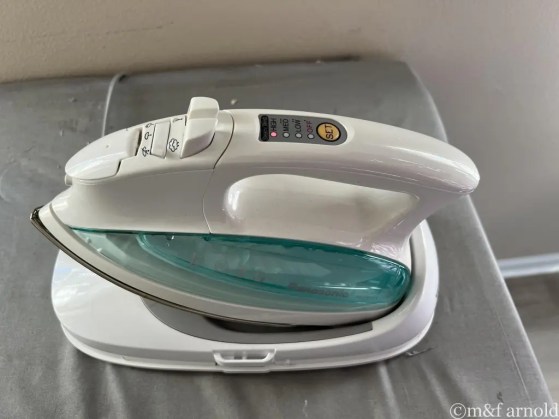
The second iron in my studio is a cordless Panasonic….
It doesn’t get nearly as hot, even on high, and it takes a while to warm up, but when I am ironing larger pieces of fabric, it is sweet to not have to worry about the cord!!!
So now I am happy with the iron situation in my studio, so let’s quit talking and get back to sewing!!
One of the things that I have struggled with on Julio, my Juki sit-down Longarm machine, is TENSION!!!
When I first purchased him, it was perfect but, as I made changes here and there, to both the top and bottom tension, it got worse and worse……
NOT good!!!
I had tried using the method of pulling on the thread until the bobbin stands up in your hand but doesn’t lift off your hand. But, it was imprecise and I was never able to get the tension exactly where I wanted it.
Being an accountant, I believe that NUMBERS are always the way to go and I longed for something that could quantify the bobbin tension…..and I found it!!
Introducing the TOWA Bobbin Case Tension Gauge….
Now it was a bit pricey ($US 55), but it looks like it will definitely be worth the money.
It is designed for bobbins that rest inside a bobbin case (NOT for drop-in bobbins), and this particular version is for the larger “M” style bobbins that are used on a longarm.
This is how it works…..
If the tension needs to be changed, you can easily reach the screw and make the changes….
But you may be asking…… “how do I know what number to aim for?”
Several of the major thread companies, including Signature and Maderia provide information as to where the gauge should fall for each type of thread. Superior Threads provides the best chart that I have found and can be downloaded on their website…..
Since I am loving Bottom-Line thread in the bobbin, this is the perfect chart for me. AND, I am thinking that I can use these numbers as a starting place if I switch to a different thread.
But the real question is whether it helped. You tell me…..
I don’t think that it gets much better than that!!
The gauge is also available for L-style bobbins which are used on many home machines.
I am super excited about this tool and am looking forward to using it for “perfect” tension!!!