Sadie’s Background iteration #3

For the last two days, I have been talking about building a background for the Saddle-Billed Stork Collage.

At this point, I was fed up with trying to use individual fabrics and decided to give painting a try!!

I had some Jacquard fabric paints but didn’t feel like I had the colors I would need, so I decided to make a run to Hobby Lobby and see what they had.

I was ecstatic to find that they had two packs of Tulip fabric paints, including one with “Nature” colors!!

I knew that these paints would change the hand of the fabric but hoped that it wouldn’t be too bad!!

I also purchased some new, wide brushes and also a new set of sea sponges….

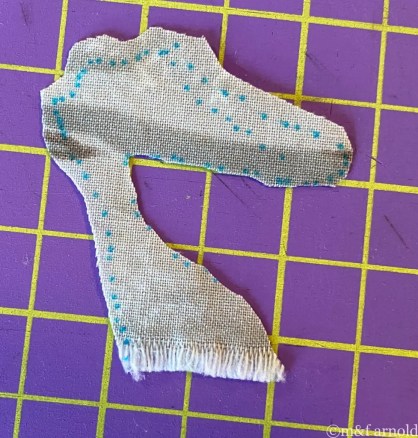
This time I worked from a full-size template and used a black Inktense pencil to draw the lines onto the PFD (Prepared-for-dying) fabric. I found a fairly easy way to transfer the design by just lifting the fabric and roughly tracing the lines

The tracing looks really dark in the video but the lines were actually quite light.

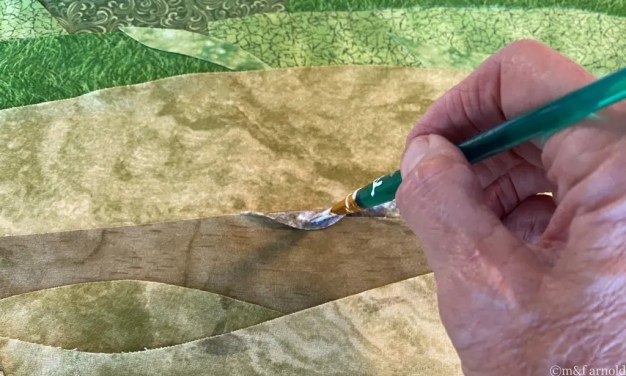
After a bit of practice, I found that the paint worked better on a wet surface so I started out by misting the area that I wanted to paint. My first problem was that the black lines turned REALLY dark when the water was added!!!…..

But, as I added more and more water, and scrubbed the line using a “scrubber paintbrush”…..

….the lines finally faded out.

I used one bowl to do all of the paint mixing for the entire project and think that it helped to keep the colors in a similar tone…..

I sprayed each area and then started painting with short “X”- like strokes, adding more water as needed and continuing until the area was filled. I found that it worked better using an almost dry brush…..

After I had basically finished painting the area, I went back over some parts with a sea-sponge to add a bit more texture…..

When everything was dry, I added Sadie…..

….and LOVED how it looked.

BUT….. there are two problems with this painted background.

Firstly, it is REALLY stiff. The paints greatly changed the hand of the fabric.

Secondly, and even more disconcerting, the paints dried with a shimmer to them. They were labeled as Matte, but they obviously had some type of sparkle added in.

As much as I liked the overall look, the two problems made it unusable!!

So…come back tomorrow for try # FOUR!!!!

Sadie’s Background…Iteration #2

Yesterday I showed the original background that I started on for Sadie, the Saddle Billed Stork….

…but it wasn’t working!!!

Now I decided to take smaller pieces of fabric and build the background up, much in the same way that I collaged the stork…..

I kept going until the bottom section was finished…..

I ironed it down onto the fusible interfacing and then used some watered-down glue to hold the edges down…..

But…..I JUST DIDN’T LIKE IT!!!!

So, I packed it all up into a basket and started over again……

Come back tomorrow for try number three!!!!

Sadie’s background….iteration #1

Now that I had Sadie looking okay….

…..it was time to think about a background for her.

One of the things that I noticed at the International Quilt Festival was that the best quilts didn’t just stop with the main portrait but took it further and added an amazing background. As an example……

“Pretty in Pink” by Judy Beskow

I am pretty sure that I want to add a lot of thread painting and other embellishments to the marsh around her feet, much like this quilt from Houston…..

So, the question for me to tackle was….”What kind of fabric background will best show up the threadwork and quilting that I want to employ.

I had attended a guild lecture the night before I started the process and she talked about using a “square” system to get your design onto the background rather than physically tracing it, so I marked out the squares and gave it a try….

It isn’t wonderful but it will get me started!!

Then I pulled out TONS of fabrics that I thought might work…..

…and I started placing single pieces of fabric in each of the spots…..

But it didn’t do it for me!!!!

There was no way to grade from one fabric into the other and it looked too stark……not “stork” (HAHA)

Come back tomorrow for the second try!!

Sadie goes on a diet

When I left you on Thursday, I had finished the collage of Sadie, the Saddle-Billed Stork…..

…but she was a bit chunky!!

When I turned her over, I could see the outline that I had drawn on the interfacing….

It was super easy to cut along the lines…..

…and a very svelt Sadie emerged…….

I am VERY pleased with how she looks and happy that the process was so easy!!!

Now I need to think about the background and, honestly, I have TOO many ideas!!

Come back for more!!!


PATTERN UPDATE…Have you checked out my pattern for "Crumbs for the Geese".  To purchase, simply click on the "Patterns for Sale" tab at the top of this page.

Head, Shoulders, Knees and Toes

Yesterday, I posted about fixing a mistake on the body of “Sadie the Saddle-Billed Stork”.

Today I am moving onto the neck and head.

I started working my way up the neck, drawing some of the shapes onto fabric using a wash-out marker…..

As I progressed up the neck, I used skinny pins to hold the pieces in place…..

….and when I was happy with it, I used my mini iron…..

…..to fuse them in place.

The only problem that I encountered was with fabric shadowing behind the yellow…..

I ended up doubling the fabric and that took care of most of the shadows. I figure that, once I have heavily stitched the area, it won’t be a problem!!

Before I knew it, Sadie had some personality…..

Next, it was time to move to her legs, starting with the knees first…..

Aren’t they cute!!!

Then I added the Hammies (hamstrings)…..

….and finished her gams with some shapely thighs…..

She is looking a bit chunky!!

stay tuned coming soon modern style background design