If you have been reading this blog in the past few months, you may be wondering exactly what happened to the Color wheel quilt. I can assure you that it is still in process!! I was super excited when the fabrics that I had ordered arrived……

They are so much better than the pieces that I tried to dye for myself!!
This quilt has been a “sort-of” quilt…… I “sort of” knew how I was going to lay it out and I “sort of” knew how I was going to attach the squiggles, and I “sort of” knew how I was going to position the Catherine Wheel circles and I have “NO IDEA” what I am going to add in the outer corners…..but that is getting ahead of myself!!! Back to the “sort-of ‘s”!!
The first thing that I needed to do was to figure out the exact size of the squiggle square because that would determine the dimensions of my inside square. I started laying it out on the floor but…..

….I couldn’t make it square to save my soul!!! I would carefully adjust one side and corner, only to have the other side not fit!! ARGHHHHH!!!
If only there was some way that I could square up the sides???? Oh yeah, I have a laser square…..let’s try that!!!

And, amazingly, I had a good square laid out in just a few minutes……

A quick measurement of the center square (47 inches) and I was ready to start cutting background fabrics…..and things started going wrong!!!
This is the layout that I was thinking about…..

I want the squiggle to be on the darkest fabric and will want at least 2 inches on either side of it. So, if I take 4 inches off of the inside square measurement, I need the center piecing to be 43 inches. These 43 inches will be split between 3 fabrics…..say 14.5 inches each.
Do you see my mistake???? There are actually FIVE strips in the inner square and not 3. So now I have cut all of the fabrics too wide….YIKES!!!
I trimmed them back down to the needed size and started working from the inside out.
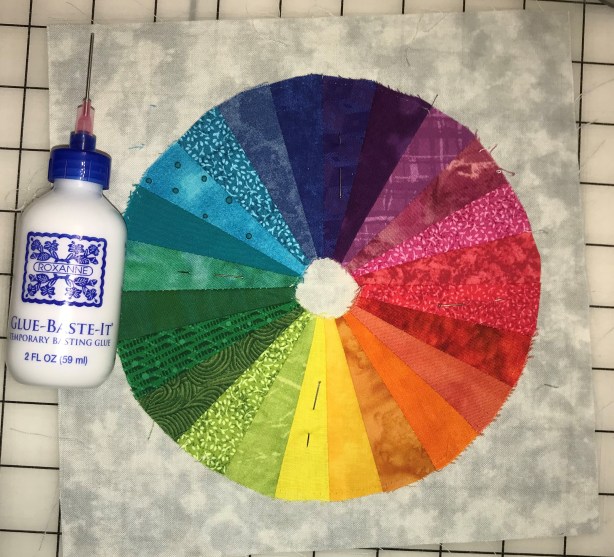
The first step was to applique the inner color wheel. I had a “sort-of” idea about how to do this using bias binding to cover the edges. My plan was to machine sew the inside edge and then hand stitch the outside edges. BUT…..no matter how hard I tried on my practice piece, I could not get it to lay flat…..the binding would pull the circle in and cause it to puff out……

At least I had the foresight to practice my technique prior to working on the actual piece!!! After several tries, I decided to change tracks and applique BOTH sides of the bias tape which meant that I could make everything lay flat. I accomplished this by glue basting the bias tape all the way around the circle before I ever started stitching…..
However, I did manage to cut the bias tape too short the first time and didn’t leave enough to join it back together…..ARGH!!! At last I had it finished…..

….but then realized that the yellow had to be on point and not on the square side of the block.
At this point I need to say…..I promise that I am smart, although you couldn’t prove it with this day’s work!!!!
Instead of re-doing the applique, I ended up adding corners to each of the sides to put the color wheel in the proper perspective……

So much for not having many seams to applique over!!!
I will leave this disaster here for now and continue with “Comedy of Errors” in tomorrow’s post!!
This must have really tested your patience.