Let’s talk Monarch’s!!

So, yesterday, I had the background finished and now it was time to think about the guest of honor….the butterfly!!

I found a great photo online and enlarged it to the size I wanted.

I started out by drawing the outline on a piece of black fabric and then roughly cutting it out.

Next, I added the wing bits…..

As I was trying to figure out how to add all of the small white areas, my friend Linda said “Why don’t you paint them??” At one point I thought I might do some painting on this quilt so I brought my paint supplies with me!!

It didn’t take long to paint the white spots. I decided to add a bit of grey to the edges to give them a bit more depth.

I also added a bit of green paint to the inner sections to give more depth there too.

Since I am NOT a painter, what I did was minimal but I think that it added a lot to the Monarch!!

Now it was time to tackle the Milkweed.

I brought this photo with me…..

….and used it as my guide.

Once again, I am going for depth so started with some paints on white fabric. I got excited doing this step and kept forgetting to take photos, but you can see it pretty well in this photo….

I started out with a sea sponge, then added brush strokes in green and then some brown as well.

Next, I used the photo and cut out lots and lots of flower shapes. The first set was fused onto the background and heavy embroidery threads were added to the centers. I also used a marker to add some more interest.
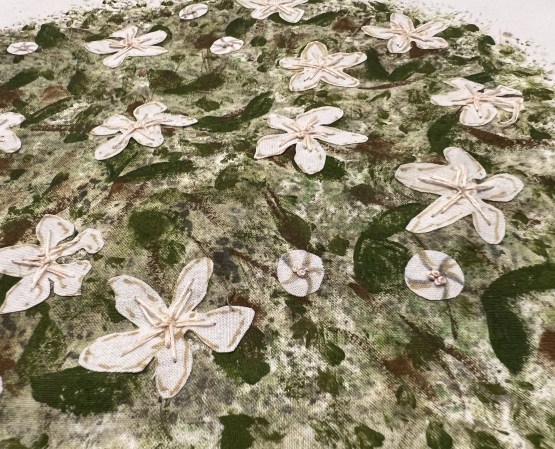
The next morning, I added a layer of batting to the back and another set of flowers…..this time sewing them on the machine….

I actually like those better than the hand-sewn ones but I think that the diversity will add to the design.

Once I saw that this idea was going to work okay, I cut out a bunch more flower shapes with fusible on the back and then also fused two fabrics together and cut out flowers that will be loose on the top.

Before I left for the retreat, I found a font that I liked and printed out the words. It was easy work to transfer them to the fusible web and cut them out of fabric. They didn’t show up well on the green background so I added a black fabric strip under them.

I will rough-cut the black before I fuse it down.

When I left the retreat, the quilt was at this stage…..


Lot’s more to come…..I just have to find the time to do it!!!


…………………………………………………………………………………………

Subscribe to my mailing list and receive this free pattern for “Dancing Squares”…..

You can sign up HERE……

Borders for Pooh!!

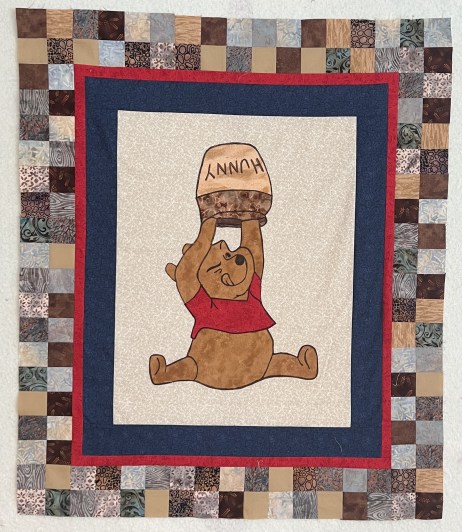
Yesterday I showed the start of a Pooh baby quilt, leaving it at this stage…..

I had sewn sets of strips together and cut them into two patch blocks……

….and then sewed those into 4-patches that I placed around the blue border…..

I liked how it looked but felt that I needed to bring some more red into the design. I started trying an outside border…..

…..but decided that it would look better with an inside border.

My problem was that the side had to be divisible by 2 and since I hadn’t really planned my borders first, I ended up trimming off 1/8th inch pieces until I got it to the correct size.

I started adding the squares and loved how it was looking…..

I added the two side borders and…..

IT WAS FINISHED!!!!

It should be fun and easy to quilt and then it can be shipped off!!!

Come back on Friday for the quilting!!

Now a question for you….. what type of quilt do you make when you need a quick baby quilt???

…………………………………………………………………………………………………….

If you have an interest in ruler quilting, check out this online course…..

Click HERE for more information

The Birth of Winnie…..

I have another baby quilt to make and this time the theme is “Winnie The Pooh”!!

I started out looking for fabric that I could use and do a simple pieced design, but apparently, Pooh is not in vogue right now, so I had to look for another idea.

I found a photo of Pooh bear and decided to use that as my inspiration……

I started out with the applique and quickly decided that he needed a lot of outlining, so out came the Fabrico markers and Pooh was born……

Now I needed to add some borders to make him larger. I was happy with the first blue one…..

….and now wanted to add some nine patches around the edge.

I had a stack of fabrics that I thought might go with the design….

….and started out by cutting a 2.5-inch strip from each fabric.

I then cut that strip down into as many 8.5-inch units as I could get from one strip.

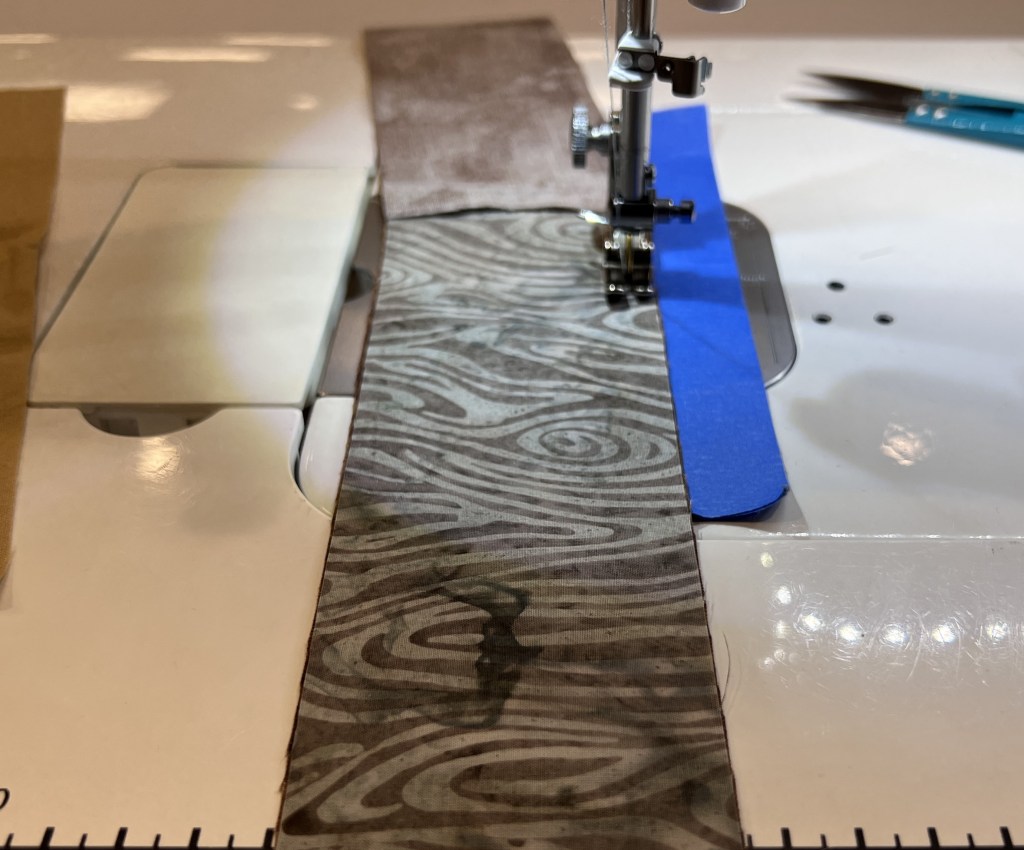
I randomly (well….mostly randomly) selected sets of strips and sewed them together.

About this time, I decided that 4-patches would be okay, which meant that I didn’t have as much cutting and sewing to do…..always a good thing!!!!

It was bedtime so I left it hanging on the design wall to conquer the next day.

Come back tomorrow and see the finished product….I am really happy with it!!!!

. . . . . . . . . . . . . . . . . . . . . . . . . . . . . . . . . . . . . . . . . . .

In this blog, I post stories about creativity, techniques, tools of the trade, and lots more about the wonderful art of quilting. If you are enjoying these posts, please subscribe to be notified of each new blog as it becomes available.

Remembering at Easter…..

I have a set of quilts that I use for each month of the year….hearts for February, ocean scene for June, sunflowers for August….you get the idea!!

Most of these I have made over the years but there are a few that my mother made and the quilt that I use during the Easter month is one of hers…..

Interestingly, it is a quilt that she didn’t particularly like but I loved it, probably because of the amazing applique and quilting.

In particular, I love the “extra bits” that were worked into each of the blocks….

The ruched flower….

….the 3-D flower buds….

the “gathered” bells…..

….and the fabric that she used for the leaves…..

And then there was her quilting…..

Every stitch was even and perfect!!

It is coming up to the 6th anniversary of her passing and putting this quilt out at Easter is a wonderful reminder of her and her love of quilting!!

If you have thought about trying ruler quilting but didn’t where to start, check this out……

…………………………………………………………………………………………………….

If you have an interest in ruler quilting, check out this online course…..

Click HERE for more information

Amazing Applique from QuiltCon

Today, let’s finish up my favorites from the Applique Category at QuiltCon 2023…..

This first quilt took the 3rd-place ribbon……

“Where We Connect” by Cassandra Beaver

Cassandra used a reverse applique technique to create the top. Dark blue was the top fabric and light blue was underneath. It reminds me a lot of a Mola design, but without the colors.

This next quilt won the 2nd-place ribbon…..

“Out of the Blue” by Linda Branting

She started out by cutting a stack of rings in various sizes and then played with the actual fabric until she found a design. The fabrics are Oakshott cross-dyes.

The quarter-inch grid quilting adds so much dimension…..

The first-place ribbon went to this beauty……

“Fazed” by Scott Murkin

Now, I like appliqueing circles, but this one went a bit far…..

The background is one piece of fabric. Can you imagine man handling that while you were appliqueing?

The last two are a different style of applique…..

Meet Frida….

“Viva Frida!” by Mary Maben

The shapes look very cohesive but are really made up of a lot of small pieces of fabric…..

The last is a whimsical quilt that I can identify with…..

“I Woke Up Like This” by Timna Tarr

The quilt is constructed using a “Stitched Mosaic” technique which includes applique within each 2-inch square. The squares are sewn together into rows. It is ALL turned edge applique!! The only fusing is the catchlights in the eyes!!

AMAZING!!!

Now I am REALLY inspired to do some applique…..how about you??


…………………………………………………………………………………………………….

If you have an interest in ruler quilting, check out this online course…..

Click HERE for more information