Applique prep – Part 3

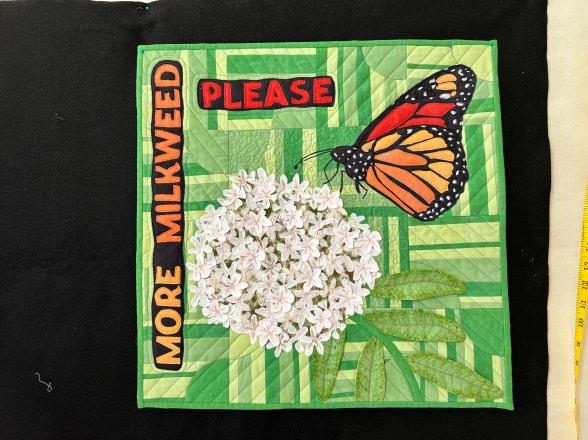
This past weekend, I presented two methods for preparing pieces for hand applique. First I tried a product from Alex Anderson, then I tried making the templates from layers of freezer paper.

Now let’s try template plastic.

The template plastic is heat resistant, and my first step is to trace the images onto the plastic, but turned them over and numbered them on the backside…..

That means that as long as the numbers are facing me on the backside of the fabric, they should be going in the correct direction.

Let’s get them cut out……

It is important not to have any little divots in the plastic as the fabric will conform directly to those, but you can use an emery board to clean up the edges….

There was one reason that I was hesitant to use template plastic. I don’t like that it simply “sat” on the backside of the fabric and wouldn’t stay put. I got tired of it sliding around as I tried to turn under the edges.

But, what if I placed a tiny bit of glue on the back of that template, and then stuck it to my fabric….

The next step was to carefully clip up to the edge of the template, especially around the curves….

Now I was ready to turn the edges under. I used the “Magic Sizing” technique that I talked about in Sunday’s post. Here is a video of the process. I switched to my travel iron which made it much easier…..

I have to say that this petal looks almost perfect….

I did two more petals and then made some comparisons. The top row was using the fusible paper from Alex Anderson. The middle row was using freezer paper. And, the third row is this template plastic……

The jury is definitely in… I’m going to work with template plastic!!!

So I need to get busy!

Since the stems were basically just straight lines, I decided to go ahead and use the templates that I had cut from Alex Anderson’s paper…..

I was very careful to cut these out CLOSE to the template so that the seam allowance wasn’t too big. I used the Magic Sizing technique and the stems were soon ready to go…..

…..although there were a few burned fingers along the way.

So, now I need to finish prepping the pieces and get started sewing.

I am really looking forward to having this to work on at night…..it sure beats snoozing!!

. . . . . . . . . . . . . . . . . . . . . . . . . . . . . . . . . . . . . . . . . . . . . . . . . . .

One of my favorite things about quilting is motivating others and helping them in their quilting journey. As part of this endeavor, I LOVE to present programs and workshops to groups and guilds around the world. All of my programs work well with Zoom meetings, and I would love to speak to your group.

You can find out more at this link…..

Appliqué Prep – part 2

Yesterday I talked about preparing applique pieces using the product from Alex Anderson, but I wasn’t happy with the results…..

WHAT TO DO!!

In a previous life, I had done some appliqué using freezer paper as my base so I decided to return to that.

With this technique, you use the freezer paper template and fold the fabric edges over it.

I traced the design for three of the blooms onto the paper side of a piece of freezer paper….

I then stacked up three layers of freezer paper….

and ironed them together using a cool dry iron….

I cut the pieces out and found that since I had used THREE layers of Freezer Paper, the template was nice and stiff…..

I ironed the shiny side of the freezer paper template onto the fabric…..

and then cut them out with a scant quarter-inch overhang.

Now it’s time to see how these edges turn over and if I can get them smoother than I did with the paper from Alex Anderson.

Since I don’t particularly like using a glue stick, I’m going to try using the magic sizing trick….

…..that I learned from Karen Kay Buckley.

Since you don’t need much of the spray, I sprayed a small amount into the cap……

And then dipped a stencil brush in…..

Note here that NOT MUCH IS NEEDED!!!

Next, I brushed the sizing onto the fabric edges….

(My concern here is that the paper is going to start losing its stiffness because of the liquid.)

I used the tip of my iron to carefully work around the pattern, pressing the edges in and holding the iron there until it dried…..

I found that the Freezer Paper DID hold its shape!!

Once I had gone around the entire petal, I turned it to the front and put the iron on top of the whole thing……

And look…..

This is the nicest-looking petal I have seen so far!!

And yes, I realize that the point isn’t perfect but I can tuck that little piece in when I’m actually doing the appliqué.

Let’s keep going.

The second one worked well but on the third one, the paper started bending a little bit. I think I used too much magic sizing on it, but I simply put the iron on it and let it dry, and then started over again with a smaller amount. It seemed to work fine. 

This one has a few more bumps in it, but again I’m thinking it’s because the paper got wet……

However, these three are certainly better than the ones I prepared yesterday……

While this technique worked better than the first one, I still had issues with the paper becoming saturated with Magic sizing and starting to lose its integrity.

SO I guess that means I need to do one more test and try the Heat-resistant Template Plastic …..

Come back Tuesday for the results!!!


Be sure to subscribe so you don’t miss a single post!!

. . . . . . . . . . . . . . . . . . . . . . . . . . . . . . . . . . . . . . . . . . .

In this blog, I post stories about creativity, techniques, tools of the trade, and lots more about the wonderful art of quilting. If you are enjoying these posts, please subscribe to be notified of each new blog as it becomes available.

Appliqué Prepping- Part 1

I have been wanting to try some hand appliqué for a while. My thought is to have something that I can have in my hands at night while watching TV.

Because you see, if I am using my computer I get too engrossed in what I’m doing and lose track of what’s happening around me…. i.e. I don’t talk to my husband.

But if my hands are empty, I am likely going to fall asleep😴😴

Doing some sort of hand work seems to fix both problems. I can be engaged but still accomplish something!!

To this end, I bought this pattern at the International Quilt Festival several years ago.

 ….and it has languished on my shelf since then.

Quite simply, I was NOT looking forward to making all of the templates for each of these pieces.

First, let me say that I do NOT do Needle-turn applique!!

So making templates and having the pieces already turned under and ready to sew is essential!!

Over the years, I have tried several methods of preparing the fabrics, each with its good and bad points, but this time I wanted to try something new.

Two years ago, at the International Quilt Festival, I found “Quilters Select Print and Piece Fuse Lite” from Alex Anderson

Each fiber-based sheet has a lightweight fusible on the back side. Using these sheets, you can draw on the backside of the fabric and then cut out those pieces to use as your template.

According to the instructions, this “paper” is water, soluble, and half of the threads will wash out. The other half stays underneath the appliqué, giving it a little more puffiness

Intriguing, right?

I selected one of the 12 designs… (the one with the least number of points), and traced all of the elements onto a sheet of Alex‘s paper 

Next, I cut them out carefully on the lines I had drawn….

After picking an appropriate fabric…… (By “appropriate, I mean NOT a BATIK. I don’t like using BATIKS for hand applique because they are woven tighter and sometimes it is hard to get the needle through!!)…… I laid out each of the petals, being sure to leave enough space to cut them out…..

Now it was time to iron them in place…..

I found that I had to hold the iron down for several seconds before the pieces would actually stick to the fabric.

Once the shapes were fused, I cut them out trying to leave a scant quarter of an inch around each one.

The instructions say to use a glue stick to secure the fabric edges to the pattern, but I really don’t like working with glue sticks. I am wondering if I can use magic sizing to crease the edges….more about this in tomorrow’s post.

Unfortunately, as I wetted the edges down with magic sizing, it started breaking down the template fabric so it was impossible to get a crisp edge.

OKAY….let’s try glue!!

I did three petals, using the glue to stick down the edges and this was the result…..

I was not able to get a good crease on the fabric, especially around the clipped curves and there were WAY too many “pointies” sticking out.

Those will NOT work for me!!

Have you used this paper and did I do something wrong??

Come back tomorrow and we will explore my second attempt…..this time using Freezer paper!!

. . . . . . . . . . . . . . . . . . . . . . . . . . . . . . . . . . . . . . . . . . .

In this blog, I post stories about creativity, techniques, tools of the trade, and lots more about the wonderful art of quilting. If you are enjoying these posts, please subscribe to be notified of each new blog as it becomes available.

Seth is on the move again…

Michael and I have a good friend name Seth. He is one of those people who has many, varied interests and he is always on the look for the next cool thing.

Fortunately for me, quilts are one of the things in his search engine so he often sends me photos of his encounters.

This quilt came from the Philbrook Museum in Tulsa, Oklahoma……

It was made in 1991 by Elizabeth Talford Scott. This is the artist’s statement…..

Tie Quilt #2 exemplifies Elizabeth Talford Scott’s innovative approach to quilting, combining objects from many generations of family and friends into a single work. In this piece, more than forty vibrant ties are sewn together and embellished with ornate embroidery, glimmering buttons, and beads in a work suggestive of a family crest or landscape. Well versed in traditional quilting-making techniques, Scott became know for working intuitively and without a pattern.

THANKS, Seth for this glimpse into the world of quilts made from ties!!

Michael and I love to travel and see new parts of the world and then I love to take those memories and turn them into quilts!!! I hope that you enjoy traveling along with us!!

Be sure to subscribe to the blog so you don’t miss a single trip!!

EXACTLY 20-inch square

Yesterday I promised that I would finish the Monarch Challenge Quilt and, for the most part, I will…..

When I left you yesterday, everything was finished except for the binding.

But, before I could add binding, I needed to ensure that the quilt was going to be 20 inches square…..EXACTLY!!!

One of the big challenges of the Cherry Wood Challenge is that they have to be the EXACT size. You can understand that when you see the way that they are displayed…..

Now I had to figure out how I was going to finish the quilt…..if I used a facing, then the quilt would need to be cut at 20-1/2 inch because turning the facing will take away the 1/2 -inch.

However, IF I am going to bind the quilt, I need to trim it to 20-inches because once the binding is folded back over itself, it doesn’t take up any of the size.

Does that explanation make ANY sense???

Anyway….. I decided that a facing wouldn’t work well because of the bulk along the bottom where the leaves were. They would not have turned under well!!

So, after a lot of measuring, I carefully trimmed the quilt top, starting with squaring-up the bottom portion.

Then I measured up to the top-right corner and squared it further…..

Happily, it measured exactly 20-inches!!

I added the binding and set out to take photos so that I can enter it into the challenge.

What do you see when you look at this photo?

Does the bottom right corner stick out to you??

It certainly does to me and I feel sure that having such a bad (un-square) corner would immediately take me out of contention for acceptance.

So that means that there is ONE more thing to do before I can call this quilt finished…..

Come back on Tuesday and I PROMISE that it will be finished!!!

Michael and I love to travel and see new parts of the world and then I love to take those memories and turn them into quilts!!! I hope that you enjoy traveling along with us!!

Be sure to subscribe to the blog so you don’t miss a single trip!!