Building community at QuiltCon

This week I am going to show my favorites in the “Community Quilt” division at QuiltCon. These are always some of my favorite quilts so get ready!!

Community Quilts are designed to do good and are raffled off to support various causes. There are a few rules…

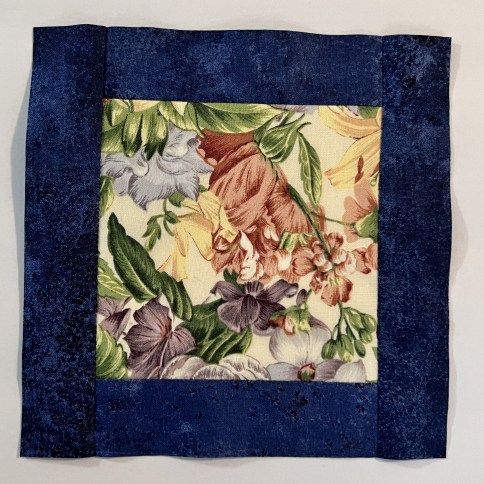
You must use this color palette….

…or at least a portion of it. You can use ANY fabrics as long as they are in this color range.

The quilts are to be made by groups of MQG members….either a guild or a group of individual members.

There is always a theme for the quilts and this year it is “SYMMETRY”.

With those rules in mind, let’s get started!!

This first was designed by an accountant so you KNOW that I was drawn to it……

“The Balance Sheet” by Jacksonville MQG

The group members used this next quilt to hone their technique for making circles, having classes and get-togethers designed to help everyone to learn…..

“Mythic Symmetry” by Cincinnati MQG

Doesn’t that sound fun!!

And, as you might guess, I was drawn to the quilting!!

This next group of 10 members certainly achieved the required symmetry, even though it was the bilateral type…..

“LMQG Community Together” by Lincoln MQG

This quilt left lots of negative space for quilting….

But the quilting in the actual design was wonderful too…..

The South Sarasota MQG seemed to have fun making this quilt……

“Get To The Point” by South Sarasota MQG

They spent one day creating the blocks and a second day constructing the final layout.

Again….lots of fun quilting….

The color palette reminded the next guild of summer evenings in the Blue Ridge Mountains….

“Mountain Evening” by Roanoke MQG

More than 15 people worked on this quilt!!

The artist statement for this next quilt says…. “Chained is a work of Improv symmetry, depicting decaying chains that descend into reflecting water…

“Chained” by Ann Arbor MQG

And you guessed it….more amazing quilting….

Apparently this quilt was designed by accident! When the completed blocks had a chance encounter with a fall to the floor, an alternate layout emerged.

“X&X” by Boston MQG

And last for today…..

“Woven Together” by Fort Collins MQG

This quilt is a wonderful mixture of many different techniques including Improv Piecing, applique, curves and fabric weaving.

I bet the had fun making it!!

Okay….come back tomorrow for more….

.

.

Please subscribe so that you don’t miss any of my favorites from QuiltCon…..

Making it less boring

When I left you yesterday, I had made a bunch of Square-in-a-Square blocks and was bemoaning the fact that they were fairly boring when set side by side!!

However, I did like this arrangement better……

AND, since I had already cut a bunch more of the inside squares, the fillers HAD to include them!!

After thinking a bit, I decided to simply add strips around each side of the blocks, starting with one side…..

….pressing them out to the strips…..

….and then adding the opposite strips…..

I purposely made these strips a bit wider than needed so that I could trim the block down to the EXACT size!!

To help with lining them up, I used a water-soluble marker to modify my 6.5-inch ruler…..

I placed the ruler on the block, being sure to line up the diagonal lines to each of the corners of the inside square…..

Since my ruler was the exact size of the needed block, I simply cut around all four sides…..

….and my block was ready to use…..

I matched the two designs into pairs…..

…always pressing AWAY from the point.

Before I knew it, the quilt top was finished…..

I love the movement that comes from the on-point squares and the straight squares!!

It reminds me of some of the “jewel matching” games on my iPhone…..

Maybe I need to make one with LOTS of different jewels on it!!

BUT….now I am thinking about other ways that I can modify the alternating blocks….the wheels are definitely spinning!!!

Freedom!!!

This July 4th, Michael and I have teamed together again to present both quilt and words that honor our defenders of freedom……

We often think of the 4th of July in terms of freedom, and rightly so – our Country’s freedom from oppression, from control by a distant, foreign power intent on exploitation. What we don’t as often remind ourselves of is the cost in lost freedom, lost health, lost lives of men and women who served our country from the 18th Century until now. This quilt of valor reflects the sacrifices from love – represented by the staggered heart blocks – by our service men and women who chose to lose their freedom and go where needed to protect each of us, and their Country. This quilt reminds us of those who returned and those who did not. We wish for no more conflicts, but know that until that Day when peace reigns, there will continue to be those special individuals who place others above themselves by moving into, not out of, danger.

Michael Arnold
Photo by Clément M. on Unsplash

Super Fast Charity Quilt

During the middle of the pandemic last year, I made my way to the Guild’s Charity storage and grabbed a few things to work on. One of those had languished in my studio until my weekend quilting spree a couple of weeks ago.

I was presented with a stack of strips and other fabrics…..

….an 18 inch block started in a Courthouse Steps arrangement……

….and these instructions…..

It proved to be a great project for when I was tired and just wanted to sew!!

I enjoyed using the given fabrics and adding some more from my stash.

When it got to the width that I wanted, I started adding strips to the top and bottom and, very soon it was done….

The finished size was 36 x 44.

I think that it would be fun to do this in kid’s fabric or bright colors and would be a great use of all of those 2.5 inch strips that I have cut and organized!!!

Scrap Heaven….

I have continued to work thru the stack of 200 six-inch squares that I received from my guild charity bee, making two quilt tops so far.

Now I was down to some rather dull and uninteresting browns and reds!!

I started by cutting them in half on the diagonal…..

Then I sewed a 1.5 inch strip of light brown fabric to one edge…..

It was pressed to the strip and then another triangle was added to the other side of the strip…..

Now it was time to trim the blocks down to a usable size. I used a trick that I had learned when making the pinwheel quilt a few weeks ago….

First, I used a water-soluble marker to draw a line 1/2 inch on each side of the ruler diagonal…..

Now it was easy work to line the drawn lines up to the actual block…..

…and they were all quickly trimmed.

Next I did the same thing with the lighter fabrics, this time using a dark strip down the middle.

As I laid out the first few blocks, I KNEW what I was going to do with them…..

I pulled more squares, adding some green into the mix as well, and also added a few fabrics from my personal scrap square box.

After I had all of them made, I wanted to ensure that I laid out the blocks in a fairly random pattern so put them into plastic tubs that I would pull out of without looking…..

After I got it on the design wall, I made a few tweaks to the placement and started sewing.

As I sewed the blocks, I did notice two holes in one of the squares……

….so I had to do a bit of rip and replace!!

Before long, the quilt top was finished……

I love the depth that comes from the mixture of darks and lights and am super happy with this “Hugs and Kisses”….”Naughts and Crosses”……”Tic, Tac, Toe”…..quilt!!

For the record, I have used 142 of the 6-inch squares and this is what I am left with……

Hmmmm….wonder what will come next!!!