I spent this afternoon at my new machine and was able to finish the Charity quilt that I started when I was shopping for Julio, my Juki 2200QVP Sit-Down machine.
To say that I am thrilled with the results would be the understatement of the year…..
I quilted 9 wreaths using the Westalee rulers and then just started adding bits and pieces to the open areas. I used rulers for fill designs, rulers for border designs, free motion squiggles and free motion straight lines……
I have found that the rulers work wonderfully and the larger doodling is easy to accomplish. I can see that I will need to practice on the smaller FMQ designs to gain the fine-motor skills needed!!
I even got brave and started working on the borders for the brown stripe quilt. You remember this one…..I was pulling my hair out over it about 10 days back (see my post “FMQ With rulers is NOT for the faint hearted).
AND, the results were spectacular……
So far I haven’t had a single moment of buyers remorse!!!
In an effort to continue the practice of using rulers for Free -Motion quilting, I brought another top home from our guild Charity bee…..
I hung it on my design wall for a few days and fairly quickly decided exactly what I wanted to do!!
I started with a big flower in the center and then started adding diagonal borders flowing out from the middle. The reason that I wanted to do borders was because of a Christmas present that I received last December……
…..the Westalee Border Sampler Template set.
I spent a lot of “treadmill time” watching videos about how to use these rulers and found them to be extremely simple and effective!!
The first border that I quilted was the Continuous Heart…..
Next was the Braid…..
Then came the continuous loop
…..and finally the continuous fill pattern……
The final quilt design was pleasing and I did learn a lot in the process…..
I did learn one other thing with this project. When I quilted the first big flower in the center of the quilt, I had trouble with the foot dragging on the seams. But, when I moved the foot up higher, then the tension started messing up. I thought back to the last project (Meadow Art) and remembered that I had successfully changed the bobbin tension many times and it produced no dire effects, so I increased the bobbin tension with my quilting and it fixed all of the tension problems.
One other comment……..
As I have been watching videos and learning about the various rulers, I have noticed that the Westalee company goes for accuracy. Each ruler has lots of registration marks designed to help you keep everything in line.
The rulers designed by Angela Walters seem to be designed for fun quilting…..not that you cant be accurate with them, but they are designed for you to get on with the job!!
I can see where each type of ruler can be useful and actually like that I have options depending on what effect that I am trying to convey.
Of course, the only problem is that I can easily start accumulating quilting rulers in the same way that I do with fabric or threads and THAT is definitely a ……
I have been talking about the charity quilt that I quilted and used the time to practice free motion quilting using rulers. The first border that I quilted was using the S-Curve ruler from Angel Oak Stitchery…..
It took me a while to figure out how to use this ruler but it ended up being super simple to use and I love the design that it gives.
Here is a video showing how it works……
When I was exploring demonstration videos of using this shape, many of them used these lines as the spines for feather patterns. That would be interesting….something I need to try at some point.
Even though every day sort of melts into the other days, it was sweet to have an OFFICIAL 3 day weekend, and making it more fun was the fact that I spent almost the entire time in my studio!!!
Last week I visited the Charity Bee from our guild and picked up a quilt top with the idea that I was going to use it to further practice ruler machine quilting. It was the perfect quilt as it was smaller (33×40) and had 20 six inch blocks for me to play with. I decided to do most of them using different techniques and was so pleased with how they turned out.
I started with the easiest one…..the Square spiral that I have already shown here…..
After that I used a few of the rulers for their “intended” purpose……
Petal Wreath -2
Interlocking circles
Clamshell – I need more practice!!
Petal Wreath
The I just started playing around with the rulers. If I got stuck and didn’t know how to continue with one ruler, I would pick up another one and add something with it……
When I got to the sashing I had fun playing with Angela Walter’s ruler named “Chevy”. Here is a video of the process that I used to quilt the sashing….
After I had finished all of the quilting, I realized that this particular sashing design added another design element to the quilt which made me SO happy…..
For the borders, I quilted each one using a different technique and ruler and have made a video with each. I will post those over the next few days.
This is the finished quilt…..
It is sweet and cuddly and I am happy to know that some young child will enjoy the comfort that can only come from having a quilt of your own!!!
AND….many thanks to Sue L. for allowing me to quilt this top that she so lovingly pieced together!!!
I am reminded that the name of this blog is “Quilts and Other Stuff” and lately it seems that I have been posting almost entirely about OTHER STUFF. So, it is with great enjoyment that I am finally getting to write about quilts!!
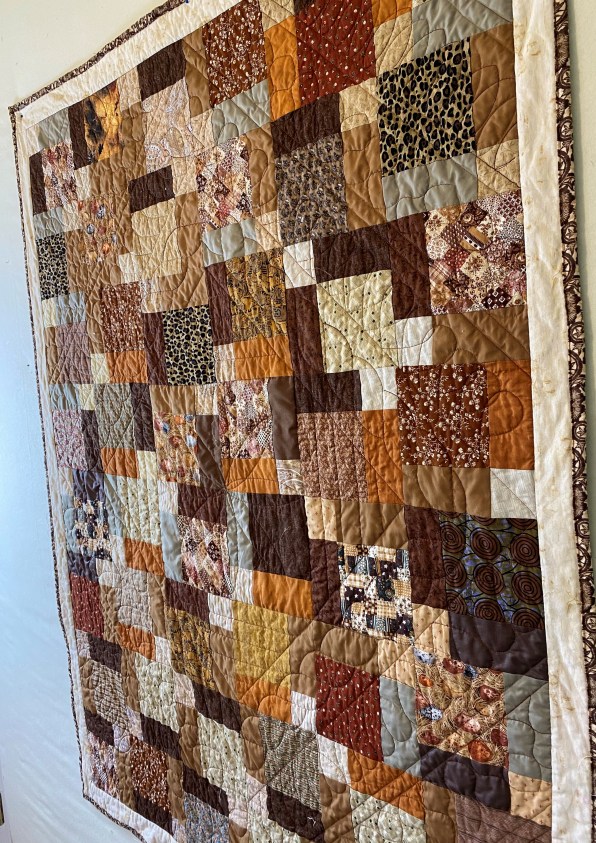
Sometime back I posted about making a “Disappearing Nine Patch” quilt (post is here) for one of our guild charity projects. I wasn’t completely happy with the quilt top and decided to try it again but this time to plan my fabrics a bit more.
SO, instead of making it completely scrappy, I used the same fabric for each of the centers of the Nine-Patch and also used the same fabrics for the four surrounding squares so that the blocks looked like this…..
They were then sliced into quarters and formed into blocks that look like this….
The final top looked like this, although the photo doesn’t do the colors justice ….
The really fun thing about this top is that it only took 1 hour and 20 minutes to put it together, including the borders!!
It is now in the hands of the long-arm quilter and will soon be handed to a deserving individual. I hope it brings them much joy!!!