I LOVE my pinwheels

I finally was able to get upstairs and put the finishing touches on the Pinwheel Quilt……

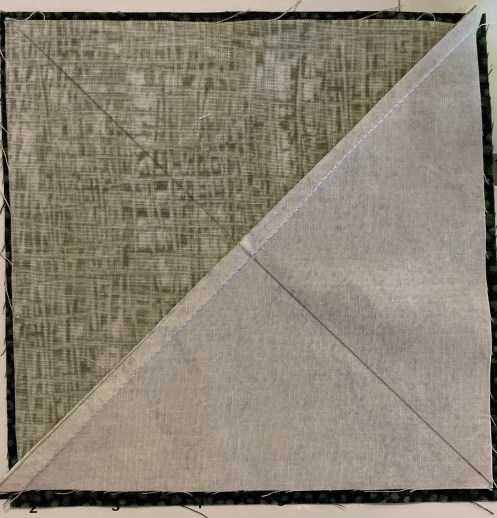
The first step was to trim the sides down…..

…and it was extremely helpful to have the 45 degree lines on the ruler to match up to the angles in the blocks.

Once trimmed, it was time to think about borders. If you haven’t figured this out yet, I really love to use a bright yellow inner border and this quilt just called out for one…..

Now it was time to audition some outer border fabrics…..

I momentarily debated about making a scrap border but then remembered my resolve from Monday’s POST to start using my yardage and not keeping for a “better” quilt!!

I chose the yardage and happily cut it into border strips and even made the binding as well!!

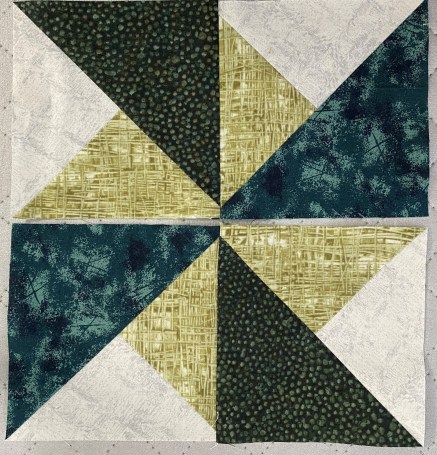
Here is the final top which will be donated to our Guild charity bee, quilted out, and presented to a Women’s shelter that needs twin-size quilts…..

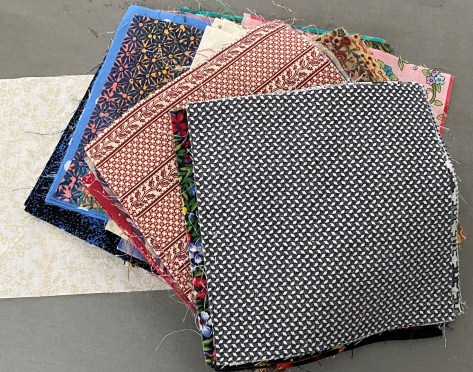
If you have been following the making of this top, you know that it started out as a way to use some donated 6-inch squares. There were 200 to start with….I used 4 for pinwheel practice and 63 in the quilt so I still have 133 to play with……

I have LOVED learning to make the pinwheels and want to do more quilts with this pattern. I feel sure that some of these remaining scrap squares will end up spinning away!!!

Pinwheels…. continued

Yesterday, I talked about the confusing nature of pinwheel blocks. Today I want to continue a bit further down the road of this journey.

Now I was ready to sew my first 4 pinwheel blocks together.

At QuiltCon I had listened to a lecture by May Chappell called “Tips of the Trade – Perfecting Piecing”. It was RAPID fire tips for the first 40 minutes followed by 20 minutes of Q&A.

One of the tips that she shared was “pre-sewing” certain areas of the blocks where the matching of seams was important but tricky…. ie….the center of the pinwheel…..

So, following her suggestion, I lined up the blocks and sewed about 1/2-inch on each side of the seam….

I opened the block up and discovered that I had MISSED the point…..

So I unpicked that small amount of stitching (rather than the entire seam) and re-sewed. The results were infinitely better…..

Now I could sew the entire seam from top to bottom and be sure that my points would match….as long as I stayed on the original stitching line. I did match the seams opposite to my stitching line just for better alignment at the end of the seam…….

The result was two nicely pieced blocks…..

Next I started working on two blue pinwheels and two pink/orange pinwheels……

One other tip that I had learned was, when you are drawing the line down a block, first hold the pencil in the exact corner and then butt the ruler up against it. I am not sure if it helped but it probably did……

So, at the end of the session, I had 6 pinwheel blocks finished…..

In the next session I will make more and start thinking about how to lay them out!!

Come back for the next installment!!

Pinwheels can be confusing!!

Last week I posted about the stack of 6-inch squares that I had received and that I was thinking about making pinwheel blocks from them.

I decided to sacrifice 4 squares and try a sample block first and man am I glad that I did. What I hadn’t realized is that from each set of fabrics I end up with TWO sets of opposite squares…..

….which means that I need two more sets that will go together to make two pinwheels, each spinning in the opposite direction…..

Confusing…..right!!!

With that in mind, I separated the squares into stacks where I had two or more patches that were the same fabric…..

….and I started making pinwheels!!

The first step was to make half-square triangles with the lighter fabrics and the background fabrics that I was adding…..

Next, I laid that half-square triangle block on top of the darker fabric…..

I didn’t worry if there was some overlap of the darker fabric square.

The next step was to press and trim the blocks down to 5 inch squares. This was accomplished by first trimming the triangle edge….

…..making sure that my ruler was centered on the block

Note that the center is lined up at 2.5 inches (1/2 of the 5-inch cutting size) AND that that the 5-inch markers are lined up at the intersection of the two block halves.

After trimming this first side, I used the cut side to line up the ruler at 5-inches

So now my two pinwheels are cut and ready to sew together…..

Come back tomorrow for the sewing and for some ideas about the quilt layout!!

Quilt Big….

I am still trying to learn how to use Julio (my Juki Sit-down long-arm) and I think that it is going pretty well!!!

I am much more comfortable with using rulers and am seeing better speed control. But, I wanted to know if I could quilt BIG……fill a quilt with large format, unmarked designs.

I turned to another charity quilt for practice.

I visually divided the piece into four columns and started quilting using a different pattern in each area. The first was a simple side-to-side column down the middle of the quilt…..

Next was a simple stipple pattern…..

….followed by a loopy stipple…..

….and finishing with a funky flower with lots of echo quilting…..

The actual quilting only took about an hour….it took longer to baste and bind than it did to quilt!!!!

It was a great exercise in QUILTING BIG and was so much fun to just cut loose and quilt FAST….FAST…..FAST!!!

One thing that I learned is that I tend to clench my jaw when I am sewing on Julio, so guess I need to remedy that by putting loud music on and singing at the top of my lungs….you can’t clench and vocalize at the same time!!!

So….. if you are driving past my house and hear loud caterwauling, you will know that Julio and I are sharing some quality time!!

Fast and Furious

Michael, my husband, has been out of the country for the past two weeks and I have used that time to get my life organized….particularly the quilting/blogging/business portion!!! I am enjoying blogging a lot more and trying to turn it into more of a business, but it takes time….lots and lots of time!!!

The other night, I was TIRED of sitting at my computer, WRITING AND THINKING about quilting and decided that it was time to do some sewing.

I turned to a kit that my guild’s charity group had provided and was pleased to open it up and see the fabrics already cut and ready to go…..

The kit even had detailed instructions about how to complete the top…..

The first step was to sew 12 W-O-F strips to 12 other W-O-F strips!! I put on my 1/4 inch foot that provides a ledge to butt up against……

…set the speed to “SUPER RABBIT”……

….and off I flew!!

After doing a bit of ironing, sewing, sub-cutting, sewing, and even more ironing, I was pleased to have this wonderful quilt top ready to go…….

I spent 2 hours from go to whoa on it and, not only did it make something that can be given away to help those in need, it gave me the welcome relief of getting to touch fabric and actually create something!!

Many thanks to our guild charity group as they do much of the “dirty” work so that I can have fun with the fabric part!!!

What do you work on when you JUST WANNA SEW?