Last week I posted about the stack of 6-inch squares that I had received and that I was thinking about making pinwheel blocks from them.
I decided to sacrifice 4 squares and try a sample block first and man am I glad that I did. What I hadn’t realized is that from each set of fabrics I end up with TWO sets of opposite squares…..


….which means that I need two more sets that will go together to make two pinwheels, each spinning in the opposite direction…..


Confusing…..right!!!
With that in mind, I separated the squares into stacks where I had two or more patches that were the same fabric…..

….and I started making pinwheels!!
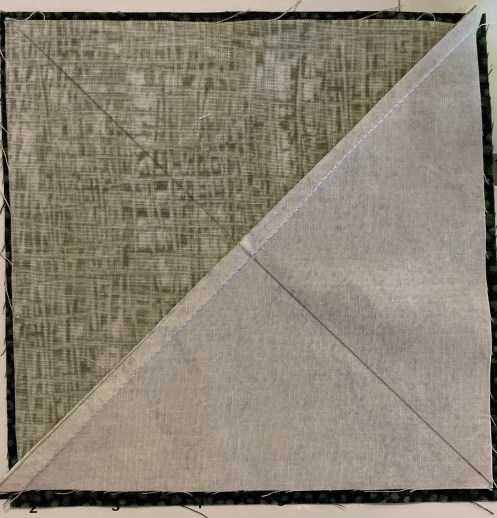
The first step was to make half-square triangles with the lighter fabrics and the background fabrics that I was adding…..

Next, I laid that half-square triangle block on top of the darker fabric…..
I didn’t worry if there was some overlap of the darker fabric square.
The next step was to press and trim the blocks down to 5 inch squares. This was accomplished by first trimming the triangle edge….

…..making sure that my ruler was centered on the block

Note that the center is lined up at 2.5 inches (1/2 of the 5-inch cutting size) AND that that the 5-inch markers are lined up at the intersection of the two block halves.
After trimming this first side, I used the cut side to line up the ruler at 5-inches

So now my two pinwheels are cut and ready to sew together…..

Come back tomorrow for the sewing and for some ideas about the quilt layout!!
Yes, sometimes your brain doesn’t want to think things through properly. Glad you sorted out your pinwheels.
I know….I kept having to stop and figure it out again and again!
I love your pinwheel top❣️ I discovered you when your top was finished. How can I see your complete blog showing the making of the blocks and putting them together with the sticks? Thanks.
Hi Sharon. The first post was here… https://francesquilts.com/charity-quilts/pinwheels-can-be-confusing/ and I think that I posted about once a week. You should be able to scroll forward thru the posts fairly quickly to see all of them.