Yesterday I fooled you and said that it was finished, but really, I needed to redo the binding so that the bottom-right corner looked better.
Don’t EVER do this unless you absolutely can’t stand it the way it is.
One of the hardest things that I have ever done was to rip that binding off…..

I knew that I was going to need to add a bit more binding so that I would have room to finish it off when it met up on the other side.
The problem was that I didn’t have much fabric left and this was the longest strip that I could make!!

Then….when I sat down to re-attach it…..THIS HAPPENED…..

Remember also, that this was the day that I was packing for our 3-week trip to Africa so there were LOTS of things on my To-Do list. I didn’t have time for this particular problem!!
Once I had worked around both corners, I folded and check the errant corner before I connected the binding…..

That is definitely an improvement.
When I rounded the corner to attach the two bindings together, I ended up with three connects really close together. I don’t particularly like it, but I can’t change it now.
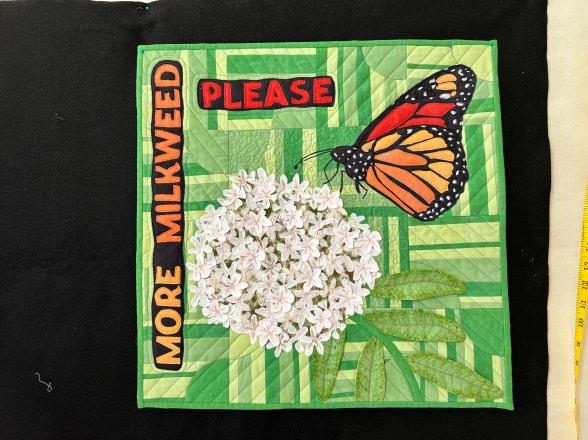
SO….. after an evening of handwork, I can call this quilt officially finished!!!

Now I am taking photos (including a ruler to show that it is exactly 20-inches)…..

…..and filling out the registration form. And of course….paying my $30.
I hope that this quilt is accepted into the Cherrywood Challenge but regardless, I have had a BLAST working on it.
I guess that means that I can take down the “Monarch Challenge” sticker that has resided on my design wall since I came back from Houston with the fabrics!!

Thanks to all of you who have sewed along with me, offering encouragement and suggestions. I couldn’t have done it without you.
Does this mean that it needs to go into a “group” category????
Until next time…..
. . . . . . . . . . . . . . . . . . . . . . . . . . . . . . . . . . . . . . . . . . . . . . . . . . .

One of my favorite things about quilting is motivating others and helping them in their quilting journey. As part of this endeavor, I LOVE to present programs and workshops to groups and guilds around the world. All of my programs work well with Zoom meetings, and I would love to speak to your group.
You can find out more at this link…..