When I left you, I had made all of the units needed for the Whirlwind blocks. Now it was time to put them together!!
As I pointed out in the last post, there were two distinct sets of triangles…..

One set has the background triangle against the rose fabric and the other has it against the periwinkle fabric. As I found out the hard way, it was important to keep these separated.
When the blocks are properly laid out, they look like this…..

The first step was to sew two of the triangle sets together…..

You may notice that they are not the exact same size, but they are made larger, and then cut down so that isn’t going to be an issue.
I pressed to the “side of least resistance”…..ie. the fabric with no seams…..

Next was to lay out the block again…..
….and sew these two larger triangles together.
Because I wanted to be as accurate as possible, I pinned these two together using TWO pins….

….one on the seam that I would be sewing on…..

….and one on the OTHER side of the triangle, matching the seams down there as well….

The reason that this second pin is important is that it helps to square up the sewing line better, especially since you are dealing with bias edges!!
I sewed along the seam…..

…being careful to use my stiletto at the ending point to keep the fabrics from shifting.
If you have never used a stiletto, here is an older video explaining how they work…..
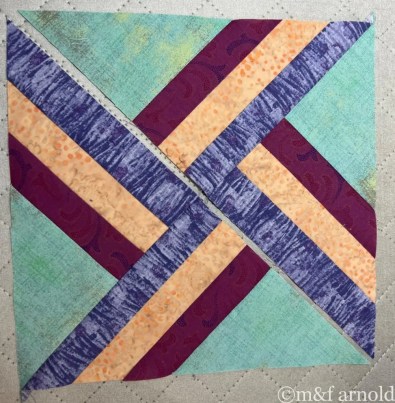
When I finished piecing all of the blocks, I trimmed them down to 9-inches…..

…although after the fact, I realized that they needed to be 8.5 inches so I RE-trimmed them!!!
Putting them up on the design wall made me smile indeed…..

Now to piece the alternating blocks…..stay tuned!!
They have turned out really well.