Like many people, I designate the month of January as a time to get organized. I plan to do some drawer cleaning in my studio and some closet/shelf cleaning in my house.
One of the things that I am not happy with is my quilting book organization. I have made a good start but it needs some refinement.
A few weeks ago I had coffee with a new quilt guild member. As we were visiting in my studio she pointed to my cutting table and asked for more information.
I realized that I haven’t shared it before, so here is the back story…..
Back in 2020, Michael suggested that we knock out a wall and increase the size of my studio by about 75%.
I said “YES PLEASE”!!!
I had previously used a collapsible hobby table similar to this one….
It had worked well for me when I had limited space. (Click HERE for more information).
But since I now had more room, I wanted a good, sturdy cutting table.
There were two other requirements…..It had to be completely covered with a cutting mat and, because I am 5’10”, it had to be taller than a normal table.
My original plan was to build it myself so I started looking to see what size cutting mat I wanted to buy. As I researched them, I decided that I wanted a Martelli mat and their largest was 30″ x 60″. That should work.
As I started planning my building project, I happened upon a picture of a standing desk like this one……
It would allow me to easily move the table higher or lower depending on my needs AND the top was exactly 30 x 60. A match made in heaven AND I didn’t have to build it myself!!!
When I set it up, I found that it has plenty of room underneath for storage towers of scraps…..
…..and a small shelf unit to hold additional supplies, and of course, my scrap bin!!
I have been using this setup for the last 3.5 years and it has worked PERFECTLY!!
One note here…. I originally had the desk up too high and found that I couldn’t press down easily while using a ruler to cut. The problem was solved simply by lowering the desk a few inches.
So, if you are in the market for a new cutting table, I would highly recommend checking out a standing desk in whatever size you need.
.
.
………………………………………………………………………………………………………
On Tuesdays, I provide a tip, technique, or product review. Please subscribe to the blog to ensure that you don’t miss ANY of them!!
This post contains affiliate links. I am a participant in the Amazon Services LLC Associates Program. I may earn a small commission if you purchase thru the links provided here. It does NOT change the price that you pay for any items you buy.
….in my studio for over a year but hadn’t tried it before.
As I was planning quilting for the Fabric Challenge, I decided that it was time to test it out.
Here are my results…..
..
I found the product to be easy to use and particularly helpful in planning these quilting designs.
It is DEFINITELY something that I will make use of in the future!!
If you are interested in purchasing Quilters Preview Paper, check it out on Amazon….
.
.
………………………………………………………………………………………………………
On Tuesdays, I provide a tip, technique, or product review. Please subscribe to the blog to ensure that you don’t miss ANY of them!!
.
This post contains affiliate links. I am a participant in the Amazon Services LLC Associates Program. I may earn a small commission if you purchase thru the links provided here. It does NOT change the price that you pay for any items you buy.
When I sent out the SOS to quilters around the world, I received several potentially good ideas so I thought that I would share them here….
Remember that I haven’t tried ANY OF THESE so am not advocating them.
The number one suggestion was that I add more circles!! While it was a good idea, it would have definitely interrupted the symmetry that I had worked so hard to achieve!!
There were several suggestions specifically for wool batting
Deb said that it had happened to her as well with wool batting. She had used Dawn, rubbed gently, and then rewashed. BUT, she had to do it SIX times!!
Sylvia said that she had soaked a wool-batting quilt in a mixture of Synthrapol and hot (as hot as it comes out of the tap) water in a bucket.
Dale said that she had used Synthrapol and had also had decent results with a heavy salt and vinegar soak and wash afterward.
Martina suggested Dawn detergent and HOT water. Her most important reminder was that you have to be REALLY patient because some fabrics won’t release until many hours later.
Judy reminded me that I MUST use detergent as it is the agent that will start shifting the spot.
Kate said that she uses “Shout”.
Mary suggested one of the OxyClean sprays.
Avon said that she had READ that Shaving cream would also work but had never used it herself.
Louise (in Australia) suggested that Rit has a run-remover.
And finally, both Barbara and Sylvia reminded me that threads can bleed as well. GREAT ….something ELSE to worry about.
The bottom line here is that I was going to keep trying things until either the spots came out, or I ruined it trying!!!
Thankfully, I didn’t ruin it!!
There is one other little place that I found and I can’t figure out exactly what it is. See that pinkish stain next to the circle……
It doesn’t look like a bleed but looks like a bleach mark. There was never ANY bleach around so I have no idea where it came from.
It is small and I probably won’t do anything with it, however…..
Donna had mentioned using Intense Pencils and a fabric medium, so I MIGHT try that to fill in that small area. But then again, I may just leave it!!
The quilt is now awaiting a sleeve so I can hang it and take photos, but here is the photo from show-and-tell at my guild meeting…..
I AM …..
.
.
…………………………………………………………………………………………
Subscribe to my mailing list and receive this free pattern for “Dancing Squares”…..
I don’t often do book reviews on this blog, but this one was TOO good to miss!!
I picked this up in my guild library and have loved perusing it over the last two months.
It was published in 2019 and is a GORGEOUS book!!
I love her introduction about how to use the book….
Think of the book as a present and future menu–well, actually more like a smorgasbord–0f possibilities from whch you can choose the things that captuyre your interest or are appropriate to what you want to make, now or in the future.
Let’s start traveling….
She provides lovely inspirational photos…..
…..lots of directions…..
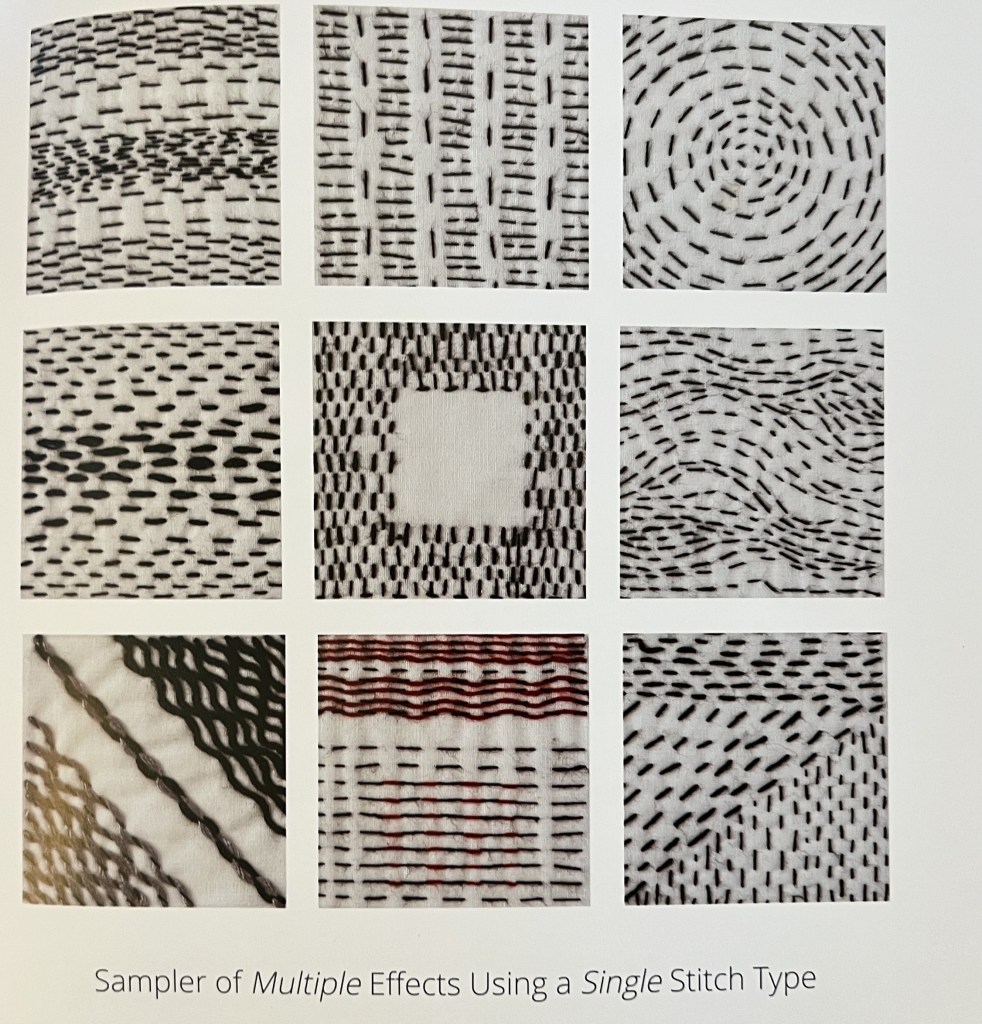
….and ideas about how to use the stitches…..
And finally, practice pieces that you can use to try the different stitches…..
This book is even pretty enough to be a “coffee table book” ( do we do that anymore??).
Now I need to buy one as well because I have to return this one to my guild library!!
………………………………………………………………………………………………………
On Tuesdays, I provide a tip, technique, or product review. Please subscribe to the blog to ensure that you don’t miss ANY of them!!
This post contains affiliate links. I am a participant in the Amazon Services LLC Associates Program. I may earn a small commission if you purchase thru the links provided here. It does NOT change the price that you pay for any items you buy.