After finishing the pasture land yesterday, I was so excited to get back into the studio to work on the sky.
I originally had this fabric next to the cows…..
…but I felt that it was too bright to fit in that spot. Then I spied THIS fabric on my shelf…..
I loved the undulations (like hills) and the blue color was perfect.
But I only had a fat quarter, and of course, it was a SMALL fat quarter (only 19-inches wide. This meant that I would need THREE cuts from this particular piece.
I started out by deciding that I wanted about 1 inch of green at the top of each slice, and drew them out before I cut them.
I checked each slice before applying the rotary cutter to make sure that the designs would work together….
It was a lot of work for one 3-inch row, but was completely worth it….
I was pretty sure that I wanted to add a row with mountains so that was where I headed next.
I sketched a basic pattern….
…. and started adding fabrics (and making changes as I went).
I wanted to use Wonder Under for the outside edges of the hills, but didn’t want the fusing to extend over the entire piece. I have found that adding fused fabric on top of fused fabric often causes stiffness, and I wanted to avoid that.
My process was simple…..
Draw the curve (reverse side) on the Wonder Under…
….cut out the curve, leaving fusible on each side of the line….
…..iron the fusible in place, making sure to leave enough fabric below the curve to complete the pattern, then cut along the curve…..
I made a number of changes as I went along, mostly adding some peaks to the curves and moving a few fabrics around.
This was the final result…
Once trimmed, I added it to the rows already in place….
…and kept on building upward!
I was struggling to find enough appropriate fabrics to make the quilt a full 60-inches in height, but my husband reminded me that it was for a baby and there was no “PERFECT” height!
That was just what I needed to declare the quilt top FINISHED….
I am super excited about how it has turned out, and I can’t wait to get started on the quilting…..
I am thinking dreadlocks for the cows….what do you think?
…………………………………………………………….
“Let’s Get Scrappy is about how to decide, not about what to make.”
Let’s Get Scrappy is an on-demand online course that helps quilters overcome decision fatigue and finally make sense of their overflowing scrap bins. With four hours of step-by-step video instruction, you’ll learn simple systems for organizing, piecing, and pressing your scraps—so you can stop overthinking and start sewing beautiful, coordinated quilts with confidence and joy.
The other day, my daughter called and started a question with “Please say no if you don’t have time!“
And I know all of you are yelling at the screen….. “SAY NO….SAY NO!!“
But being a good mother (don’t ask my kids for their input), I listened to her question.
One of the couples that she and her husband are closest to are about to have their first baby.
Do you know what’s coming?
She asked if I had time to make a baby quilt, and of course, she would pay me for my time and materials.
We agreed that I would do it if I could, but that I didn’t have to give her an answer right away
Well, you know what happened. Jenny told me that their theme was boats and whales. Of course, I had to Google it
One of the images that I found was a pattern called Explore” by Magic Little Dreams
It looked relatively easy, at least in that 2-inch picture on my screen, so I sent it to my daughter and asked if it would be appropriate…….
She answered in the affirmative.
I purchased the pattern and was horrified to realize that it was a pieced design and that there were 400 pieces in the baby quilt.
Not only that, most of the seams were angled, and the design would not work well if those seams didn’t line up perfectly!!
I drew out two of the blocks to solidify my suspicions….
At this point, I was shaking my head and saying…….
I really liked the movement in the quilt, the sprinkling of fish along the way, and the very cute whale at the bottom. So, how can I simplify it ??
My first thought was to make the design bigger so that it didn’t require as many pieces of fabric. But there would still be angled seams that would HAVE to match.
My second thought was to fuse those fabrics down rather than piecing them.
WE HAVE A WINNER!!
I loved the movement the designer had achieved with the pieced blocks, and decided to emulate that with smooth curves … And Wonder Under, of course!
I decided to design the quilt in the same manner that she had, putting two sets of blocks together, and having the waves undulate between those two sets of blocks.
OKAY….I simplified it somewhat. What else can I do?
Instead of making the quilt interior 40 inches wide, I chose 30 inches, and instead of 50 inches tall I went for 40.
If I kept her 5-inch width, I could do three sets of two blocks to make each row of the design,
But that would still mean that I would have to sew these blocks together, making sure that all of the curves met up perfectly.
NOPE!!
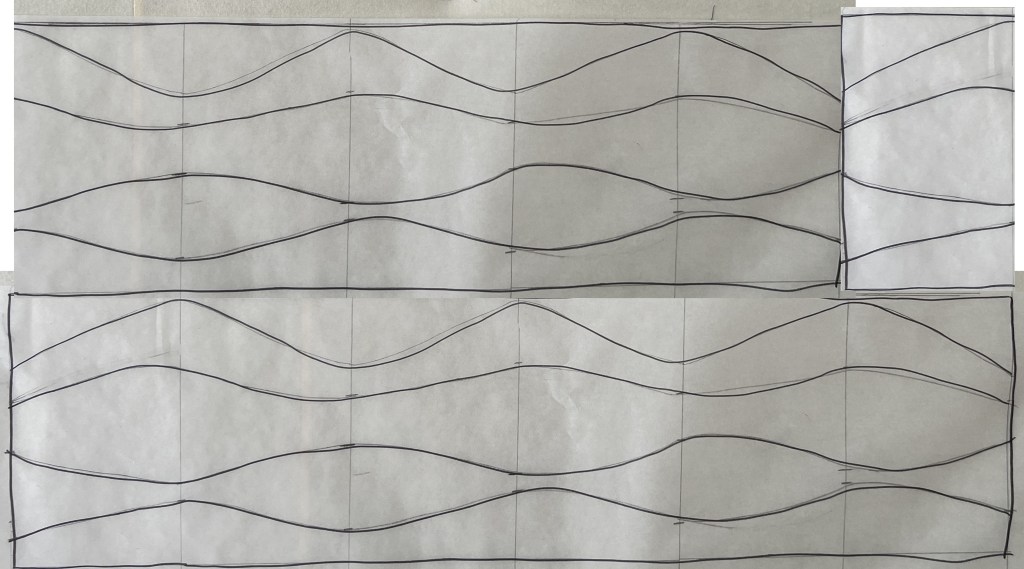
OK new plan… Let’s make it in strips that are 30 inches wide, and make the strip set 8 inches tall, something like this……
As I look at what I’ve drawn, I am thinking that the middle strip needs to be a little narrower.
I will offset these as she has done in the pattern to give more interest to the waves.
I think that THIS quilt is entirely doable!!
SO…..
Is this the same quilt?
Not really, but the idea came from her design and I will ALWAYS give her credit!!
Is it a quilt that I can finish by the September deadline?
Absolutely!!
Of course, I immediately started pulling fabrics…
….but, if I am going to keep this cute for a baby, I think that it needs some solids and surprisingly, I don’t have many solid blues! So even though I prefer to work from my stash, I’m thinking that a trip to the fabric store is in my future…..after all…. my daughter is paying!!🤣🤣
If you enjoy this blog, please share it with your friends!!!