Vintage Lambs – Part 2

In Sunday’s post, I described the trouble that I had in finding a pattern for a 1950’s lamb applique!! Once that problem was solved, it was time to think about a background!!

I knew that I wanted to have a “meadow” style of background with a peach-colored border around the meadow. I knew that I wanted to use a BUNCH of fabrics…….

Well, at least that part was easy!!

I packed all of these fabrics up into my “retreat” bag and happily pulled them out to start working on.

Now, at the retreat, several people had brought books and magazines that they were finished with and wanted to give away. One of those books was this one……

….and this quilt in particular……

My friend Sheila had assured me that 60-degree diamonds were super easy to piece and I thought that this might be a good way to do my background!!

Now, it would have helped if I had stopped and read the directions, but that would have been too easy wouldn’t it??

My first task was to figure out how many strips of fabric I needed to give the desired heigth of the meadow. I drew out a sample and measured between the diamonds how many strip sets I would need……

Do YOU see the error in my calculation???

You Soon Will……

So, I spent some time looking at the value of the fabrics, even taking B&W photos……

….and confidently sewed the strip set…..

I lined up the 60-degree angle with one of the edges…..

….and started cutting strips……

But, when I laid them out……

HMMMMM….wasn’t this supposed to be more vertical than this!!!

Do you know what I did wrong????

When I did the measurements, I didn’t take into account that for every 2 diamonds that sit point-to-point, there is ANOTHER row of diamonds in the middle…..

So, my background was at least 1/3 too small and closer to 1/2 the size that I wanted!!

I was SO FRUSTRATED!!!!

It was late in the evening and I should have just stopped, but I was determined to figure out some way to salvage what I had done.

As I was pacing back and forth beside my table, I noticed a fabric that one of the other gals had given to me as a gift. It was the perfect color to be the bottom of the meadow!! I started cutting strips out and slowly, ever so slowly, piecing them into the already sewn strips.

And then I had this……

THAT, I could work with!!!

I went to bed knowing that everything was going to work after all!!!

The next morning, I un-sewed a few sections and added strips to the top of the meadow…..

After that, it didn’t take long to audition some border fabrics…..

….and get the top ready for inhabitants……


Come back tomorrow for the next steps!!

Let me say that I really enjoyed working with the 60-degree diamonds and am already thinking of another project to highlight them……WHO knows where this thinking will go!!!
Vintage Lambs….part 1

Michael and I have a wonderful friend named Katie and she and her husband are expecting their first child…..a bouncing, baby girl!!!

Naturally, my first question was “what are your colors and themes”. She knew exactly why I was asking so she smiled sweetly and said “Peach colors and 1950’s Lambs”!!

1950’s Lambs???

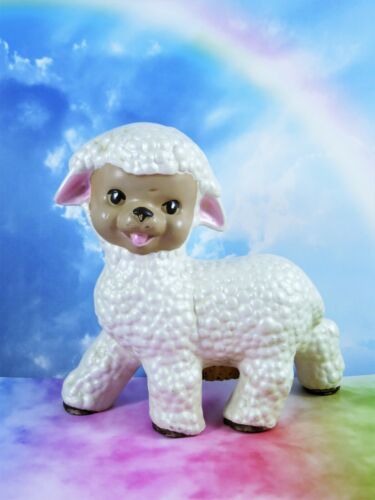
When I started doing a google search, I kept coming up with tchotchkes like these…..

While they were cute, they weren’t a good design to work from!!

I then remembered the baby quilt that my Mom had made for me….. it had an applique lamb on it…..

….but it was so bady worn that I couldn’t really see any of the details to use it as a pattern!!

WHAT WAS I GOING TO DO????

I had to send an email to our Guild membership about another subject and added a line to it asking if anyone had 1950’s style lamb patterns and several people sent photos and ideas. But Rosie, told me to change my google search to “VINTAGE” lamb patterns. Not only did she put me on the right path for searching, but she also sent a “coloring page” that she had found when she searched…..

I took one look at it and was sure that I didn’t need to search any further!!!

Next step is the background…..come back Wednesday!!!

Design by committee?

Last week on our guild retreat, I planned to make a baby quilt top for a great-niece. Her mother (my niece) is the twin sister of the mother of the twins that I made quilts for a few months back. Are you confused???

Anyway, these were those quilts….

As I started thinking about a quilt for this new cousin, I wanted to make it in the same style but in little girl colors, and in this case, peach and green!!

And, instead of African animals, I planned to used Teddy Bears.

I started out by fusing the bears to the first panel and then adding strips as I moved up the quilt.

I was feeling that it was a bit top-heavy and several people began making suggestions as to how to fix the problem. I took a quick snap of the process…..

…and realized that we had managed to make it super heavy in the middle.

Instead of continuing to gnash over it, I decided to go for a walk to clear my head. After a few minutes in the great outdoors…..

….I started feeling better…..

When I got back, I took the part that I really liked (the bears and below) and replicated that at the top of the quilt. That way it was better balanced. Then I filled in with strips until I was happy with the way it looked……

I was looking forward to quilting this piece but waited on that until I got home again.

Come back tomorrow to see how the quilting worked!!

The “Bros” Quilts

A few months ago we found out that our good friends, Austin and Ruth were expecting TWIN boys!!! We were so excited for their news and, of course, my first thought was about quilts. I had made this quilt for their first child, Bo…..

….and I wanted to make something similar for the “Bros” that were to come.

I found this wonderful book and knew that I was on my way…..

First step was to make the paper pieced animal blocks, which I discussed in this blog post….. https://francesquilts.com/2019/05/27/paper-piecing-at-its-best/

Now to think about the rest of the quilt!!! I knew that I wanted to keep it in a similar vein to Bo’s quilt so there would be lots of strips. Ruth and I had talked about using greys and reds and I came across a fabric set that I had bought for another potential project (that never materialized) and I was off!!

I used the 1/4 inch foot on my machine and it made sewing the strips SOOO much faster and easier AND more accurate!!….

And, staying in the vein of “upping my game”, I spent a lot of time ironing each strip, spraying it with Magic Sizing and stretching it to the side as I was pressing it to ensure that the rows stayed straight…..

Before long the quilt tops were complete…..

I wanted to use these quilts for additional FMQ practice so I decided to work on a bunch of different designs, each following one of the strips. I did a number of them using various rulers….

….and was pretty happy with the results. I especially liked this ruler…..

….and really liked the quilted design that came from it…..

I did have to use masking tape on the ruler to ensure that I kept the design going down the middle of the strip. It was NOT intuitive!!

I also found that, if I was using an undulating pattern, it was important to only stop and reposition the ruler when I was at one of the “hooks”…..

If I repositioned anywhere else on the quilting line it distorted the design and I lost the symmetry of the quilt line. This is something that I probably should have thought about before now, but it took having to re-do it a couple of times to get it fully into my mind!!

I enjoyed trying different patterns and designs and the long strips were perfect for practicing. Here is what some of the quilting looked like on the back…..

When I finished with the quilting, I used the Laser Square and my 16 inch ruler to make sure that the sides were completely straight and the corners at 90 degree angles…..

I chose to put the binding on by machine, going very slowly and working on the corners very carefully. I am constantly reminded that the last judge REALLY didn’t like my corners and I am trying to do better with them!!!

At last, they were finished and I am super happy with how they came out…..

Once I had heard that there were twin boys I started calling them “Bo and the Bro’s”…..I know it sounds like a singing group!!! And sweet Bo cant say my name, Frances…..so he calls me “Fre-Fre”….it is heart melting!!!! When I put these two facts together, the name for the quilts came easily, as did the signature line on the label…..

It was so much fun to work on these two quilts and think of the fun times that the boys will have on them…..here’s to lots of spit-up, poop, ice cream cone drips and hopefully cuddling under them for nap times!!!

This blog is linked to “Favorite Finish” at Meadow Mist Designs……..

First Finish of 2019……

I have had a bit of time to spend in my studio over the last couple of weeks and am desperately trying to get several quilts finished for our upcoming guild show.    I have already registered them and hope to get them finished by the receiving days in February.

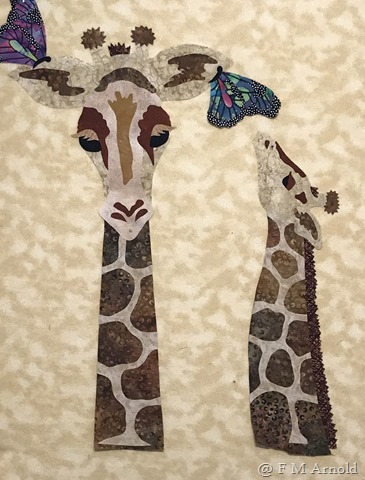
The first finish of the year is a baby quilt that I LOVED making.  I found the pattern on the first night that we were at the Houston show and KNEW that it was exactly what I wanted.  The pattern was “My Favorite Earrings” by Sandy Fitzpatrick. IMG_7546

Isn’t it the cutest thing!!!!

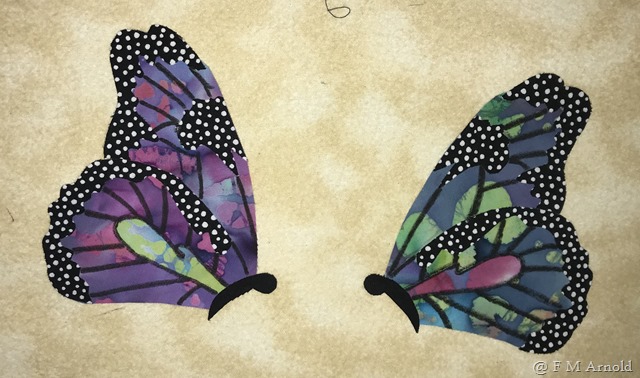
I had help from my friend, Katie, to make the butterflies.   She and her husband came to our house on Christmas Day to share some Chinese Food and chatting time and she and I magically ended upstairs in my studio.   I showed her the pattern and gave some basic instruction about how to use Wonder under and she was off!!  

IMG_7439

When I originally cut the fabrics out, there wasn’t enough contrast between the head and the background and it didn’t look great…..IMG_7441

….so I pulled out my trusty sea sponge and light brown paint and added some “shading” on the heads……

IMG_7443

It really made a LOT of difference!!

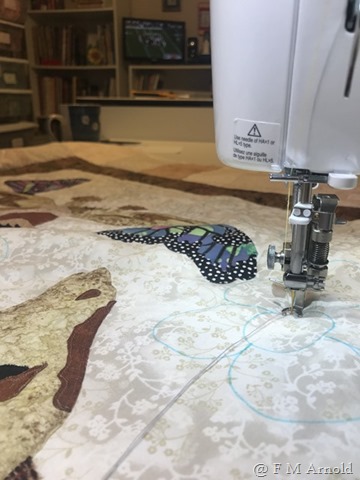
As I got ready to quilt, I kept seeing “flower power” designs so added those first with some variegated threads….

IMG_7492

….and then echoed the flowers throughout the rest of the piece…..

IMG_7529

Finally, I used one of my ruler’s to quilt the border, but I talked about that HERE.

All in all, I am thrilled with this first finish of the year….here’s to more to come!!