Now let’s make SMALLER Dresden Plates….

Yesterday I told you about a new quilt that I have started focusing on the Dresden plate block.

This 9-inch variety was fast and easy…..my two favorite words…..

BUT, could I make them smaller??

I recently purchased these rulers to make smaller plates…..

…and I was excited to try them.

I started with the “Mini” ruler which used a 3.5-inch strip….

Since these wedges are wider (30-degree), only 12 are required to make a plate.

They are also easier to work with because the hole in the middle is built in for you. It didn’t take much time to finish this 7-inch plate…..

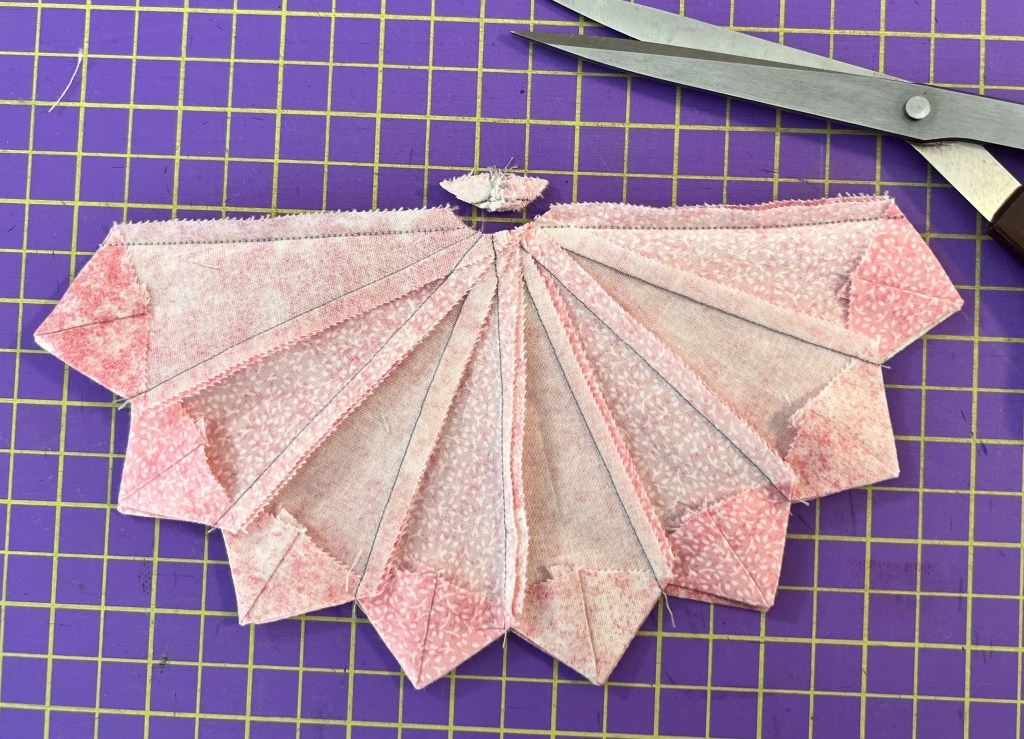
Then it was time to try the “TINY” plates.

These started with a 2-inch fabric strip….making for VERY Small wedges….

I was once again worried about turning the points, but my trusty tool worked beautifully…..

….and I quickly had another plate (4-inch) ready to show……

I like the look of the design when all of these sizes are put together…..

What will it become……who knows!!

Tomorrow I will start sharing photos from the International Quilt Festival in Houston, Texas so PLEASE come back for the show!!

.

. . . . . . . . . . . . . . . . . . . . . . . . . . . . . . . . . . . . . . . . . . .

In this blog, I post stories about creativity, techniques, tools of the trade, and lots more about the wonderful art of quilting. If you are enjoying these posts, please subscribe to be notified of each new blog as it becomes available.

Let’s make Dresden Plates

As I mentioned in Thursday’s post, I have been thinking about a Dresden Plate quilt.

My fascination started over a year ago when I saw the 22.5-degree wedge ruler from Creative Grids……

….and then watched a YouTube video about how to use it!! Isn’t it amazing what you can learn on YouTube?

Per the instructions, I picked a size to use (5 inches in this case) and cut two strips of coordinating fabric that width…..

I stacked them on top of each other and used the wedge ruler to cut the shapes…..

It was fun to see how they were going to look when pieced….

Now I was off to the machine, starting by folding the wedges in half……

…..and stitching along the wider edge…..

Once I had all 16 sewn…..

…it was time to turn the points……

I was afraid that this might be difficult, but it was fairly easy to do, especially using the pressed center line to line up the seam…..

Once folded and ironed, it was time to match up the sets…..

….stack them one on top of the other, and sew down the long edge…..

Very quickly there were twos….

…..then fours….

…..eights…..

And finally, a full plate…..

Since I was going to cover the center with a circle and didn’t need all of those seams meeting together, I took a pair of scissors and cut it out some…..

When I added a circle, it looked perfect…..

Now the question is….what will I do with this dresden plate……

Why….make more of course!!!

Come back tomorrow for a couple of smaller versions…..

.

If you enjoy this blog, please share it with your friends!!!

Thank you…….