In this blog, I post stories about creativity, techniques, tools of the trade, and lots more about the wonderful art of quilting. If you are enjoying these posts, please subscribe to be notified of each new blog as it becomes available.
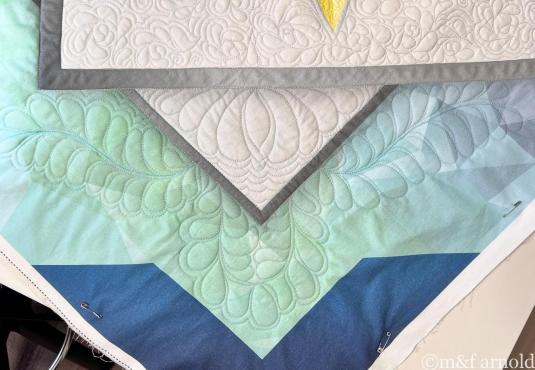
This time I wanted to try something a bit different and have the feathers both go the same direction so that it looks as if the feathers duck behind the triangle
….get it….duck feathers!! Hello….is anyone out there???
Sorry… a bit off-topic.
I started the same way by drawing the spine onto the fabric…..
After I quilted the two plumes, there was a LOT of space left that would need a filler pattern, and, frankly, I didn’t want to spend THAT much time doing filler.
So, I decided to branch out again and quilt another smaller feather heading into the corner…..
As you can see, for some reason, I made one of the feathers short and fat but was able to compensate by curving the next feather over the top, filling in the area pretty well.
I would love to try a feather sometime where there is a LOT of curving over the previous loop.
After I finished these plumes, there was a bit of echoing and filling and then it was finished……
One of the most important things that I am learning here is that…..
THE FEATHER WILL LOOK GREAT REGARDLESS!!!!!
And that is an important thing to learn!!
Are you in a rut with your machine quilting? Sure, you know HOW to do FMQ and you have 4 or 5 patterns that you do well. BUT, you are bored with those designs and need a push to try some new things. If so, please join “MOVE-IT…. a Free-Motion Quilting Boot Camp”!! I will take you on a FREE 10 week journey to learn new designs and become more comfortable with just MOVING IT!! You can sign up by clicking HERE
I have recently started another of Angela Walter’s free-motion quilting challenges…..feathers this time!!!
I have always had a love/hate relationship with feather designs. One side would look great but the other one….well, let’s just say that bird wouldn’t be able to fly!!!
Although it isn’t a requirement, I purchased her panel…..
…and the Glide thread collection that went along with it…..
With a bit of fear and trembling, I stitched the first feather…..
It was a simple feather, where the petals don’t touch.
OKAY….that worked alright!!
Let’s try it again on a thinner section….
That was actually easier!!
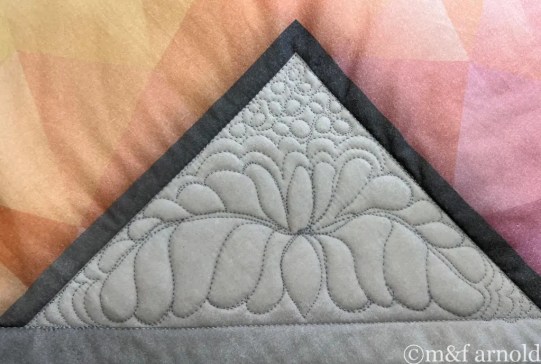
Then it was time to move on to the harder type of feather. Angela calls this the custom feather but I have also heard it called the “bump back feather”. It is harder because there is a section of each petal that you have to travel back along the previous stitching.
This one wasn’t as good but I tried the same feather again and it looked much better….
The final design that she taught was a “fern-looking” feather….
This was fairly easy to do, but I did have trouble heading in the wrong direction when I got to the outside edge of the feather….
This one had to be un-sewed and then redone with the curve heading in the right direction.
That looks better.
I am happy with my first feather foray….
and can’t wait to try more!!!
If you are interested in the challenge, you can check it out HERE….
Are you in a rut with your machine quilting? Sure, you know HOW to do FMQ and you have 4 or 5 patterns that you do well. BUT, you are bored with those designs and need a push to try some new things. If so, please join "MOVE-IT.... a Free-Motion Quilting Boot Camp"!! I will take you on a FREE 10-week journey to learn new designs and become more comfortable with just MOVING IT!! You can sign up by clicking HERE.