Making it less boring

When I left you yesterday, I had made a bunch of Square-in-a-Square blocks and was bemoaning the fact that they were fairly boring when set side by side!!

However, I did like this arrangement better……

AND, since I had already cut a bunch more of the inside squares, the fillers HAD to include them!!

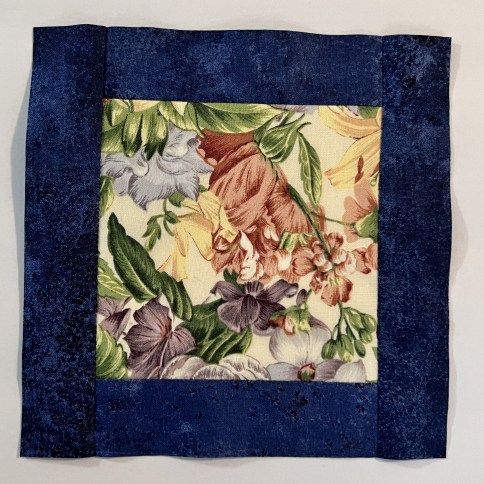
After thinking a bit, I decided to simply add strips around each side of the blocks, starting with one side…..

….pressing them out to the strips…..

….and then adding the opposite strips…..

I purposely made these strips a bit wider than needed so that I could trim the block down to the EXACT size!!

To help with lining them up, I used a water-soluble marker to modify my 6.5-inch ruler…..

I placed the ruler on the block, being sure to line up the diagonal lines to each of the corners of the inside square…..

Since my ruler was the exact size of the needed block, I simply cut around all four sides…..

….and my block was ready to use…..

I matched the two designs into pairs…..

…always pressing AWAY from the point.

Before I knew it, the quilt top was finished…..

I love the movement that comes from the on-point squares and the straight squares!!

It reminds me of some of the “jewel matching” games on my iPhone…..

Maybe I need to make one with LOTS of different jewels on it!!

BUT….now I am thinking about other ways that I can modify the alternating blocks….the wheels are definitely spinning!!!

Quilting Economics!!

Before you completely tune out, I am not talking about Economics in the normal sense of the word but, instead, about the “Economy” block.

OR, as I call it….. “Square in a Square” block…..

I had posted previously about a stack of 6-inch squares that I had procured from our Charity Bee and was determined to make quilts from. This was my first quilt…..

…and now it was time to make another one!!

When I was at the International Quilt Festival back in November, I laid down a bit of cash for a series of rulers from Deb Tucker. One of the rulers was the Square-in-a-Square block…..

…or as she calls it….. “Square Squared”!!

Like many of her rulers, this one is used in two separate steps.

First, you use one side to cut the inner square….

Since I am making a 6-inch finished block, I am using the largest of the squares.

Now you look at the chart printed ON the ruler to see what size the cuts need to be for the setting triangles….

Following these instructions, I cut my squares at 4.25-inches, and then cut them on the diagonal to make triangles….

Moving to the machine, I sewed one triangle onto opposite sides of each square. In her video she suggested that you sew from the cut square side rather than the triangle side…..

This was really helpful to keep things lined up better, particularly when I was sewing the second set of triangles.

Once the first two are sewn on, it looks like this…..

Those dog ears bothered me, so I clipped them off…..

I pressed to the triangles and was left with this…..

Now it was time to add the second set of triangles…..

…..again….sewing from the cut square side…..

It really didn’t take long to piece the block….

But now it needed to be cut down, which meant using the OTHER side of her ruler.

The first step was to line up the ruler over the block, making sure that all four corners matched the 6-inch markings…..

You trim one side and then turn the ruler to trim the other…..

The result is a perfectly sized block…..

Now I started laying these up on the design wall…..

….and honestly, it looks fairly boring!!

I liked this arrangement a lot better…..

…but now I have to find something to add to the alternating blocks!!

Come back tomorrow to finish the quilt!!

“It’s The Great Pumpkin” Block

Yesterday, I started describing making the next block in the 2021 Monthly Color Challenge, and when I left you, I had made 8 flying geese using the “No-Waste” method.

Next, I needed to make a Square-in-a-square block.

I love these blocks but have always struggled to get them to be the exact needed size. But Jen fixed this problem by having us cut the center square to an exact size of 1-7/8ths inch.

The outside triangles were cut a bit larger than needed and then trimmed after being sewn on. This was SO smart because I didn’t have to worry about getting the corners of the triangles to fit just perfectly!!

When it came time to trim the block down, I once again used a washable pen and marked two lines on the ruler. These lined up with the points on the inside square…..

….making the cuts easy to determine!!

Now it was time to sew the patches together into the block and I ran into a problem as I prepared to sew the final row. The row was visibly smaller than the previous one!!!!

I decided to video the stretching process so maybe it will help when you are struggling with the same problem……

I really like the final block……

….and it will be a great addition to my color challenge quilt!!!