Too pretty to use

We all have fabrics that have sat on our shelves for years because they were simply too pretty to cut up.

I hadn’t realized it, but I also have threads that I treat the same way!!

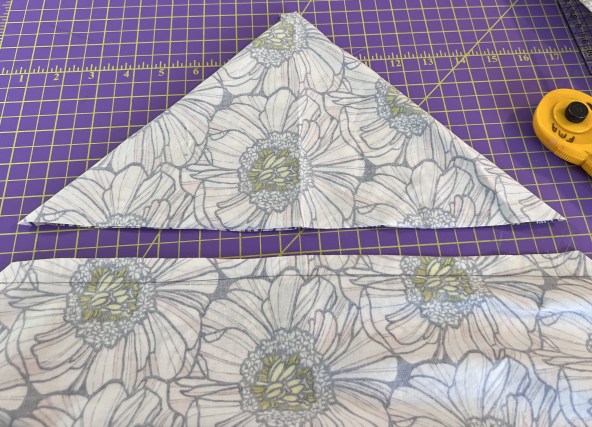
In 2020 I made this quilt top…..

….thinking that I would use lots of colors of thread for the quilting

When Christmas rolled around, all I wanted was one thread collection from Aurifil…..Patrick Lose Essentials. Forty-five spools of thread in an amazing array of colors.

It came in a pretty box and I dutifully put it in a drawer of its own so I wouldn’t use it for any other purpose…….

So, two and a half years have come and gone, and that thread box is still in the drawer.

As I posted yesterday, my plan for this quilt has changed, and I will probably just use shades of gray in the quilting.

So what am I going to do with these threads?

Let them sit?

Or, get them ready to use.

 I chose the latter!!

At first, I took the threads out of the box and put them in their respective thread drawers……

….but quickly realized that having the wrappers on them was going to make it harder for me to grab and use and consequently, I probably would never touch them 

I had to do something about that!!

It took about 20 minutes, but I carefully unwrapped each thread…..

….and added it to my thread cabinet……

I needn’t have worried about mixing them up with my other threads, as the bright red spool makes them easy to distinguish.

I am delighted with the additions to my purple threads as those were a bit scarce….


So, that job is finished and the upside is that I have a fun box to do something with…..

…..and a COMPLETELY empty drawer…

I’m sure I can find something to fill it up with!!

If you like my thread cabinet, you can learn more in this post……

….and it can be purchased HERE.

One of my favorite things about quilting is to motivate others and help them in their quilting journey. As part of this endeavor, I LOVE to present programs and workshops to groups and guilds around the world. All of my programs work well with Zoom meetings and I would love to speak to your group.

You can find out more at this link…..

This post contains affiliate links. I am a participant in the Amazon Services LLC Associates Program. I may earn a small commission if you purchase thru the links provided here. It does NOT change the price that you pay for any items you buy.

Thread Holder Mumu….

Are you old enough to remember Mumu’s??

Growing up in the 70’s, I immediately think of Mama Cass Elliot…..

Now, you may be asking…..exactly what does this have to do with THREAD???

Let me backtrack…..

This time last year I purchased a rolling drawer system to house my threads. You can read about it here……

At the time, I said that I needed to make a cover for the case to keep all of the fabric-related smutz out, but that never happened. Part of my procrastination was that I knew I would need to make a pattern and then figure out which fabric to use…..etc!!!

Then, yesterday I was cleaning my studio and it suddenly occurred to me that I had several large (2-4 yard) pieces of fabric that had been given to me and that one of those would be the perfect cover.

I pulled the fabric off of the shelf and draped it over the case to see if it would fit and found that, if I kept it loose, I really wouldn’t have to do much sewing. The fabric had some bits cut off one end and side, so I first had to even it up a bit…..

…and then sewed down both sides…..

….and…..VOILA…… the Thread MUMU was born…..

I wasn’t particularly happy about the “wings” extending from the sides, so I pinned it where it needed to indent…..

….used a 90-degree triangle ruler to line everything up and drew in my sewing line…..

Once I was sure that it was going to fit, I trimmed off the extra fabric…..

…..added a hem to the bottom….

….and the Thread Storage MUMU was born…..

It fits perfectly in its place along the wall……..

…and the top shelf is still available if I need temporary storage for other items…..’

I actually laughed out loud when I typed the word “temporary” as some of these items have lived on this shelf for more than 9 months!!!

So, in less than 30 minutes, I have a cover that will protect my threads and yet be easily removed when I need to get into a drawer.

THAT is the epitome of a good afternoon in the studio!!!


Do you have EASY solutions to storage issues? If so, please share them with me!!


If you have an interest in ruler quilting, check out this online course…..

Click HERE for more information

Thread Storage — CHECK!!

Eighteen months ago I remodeled my studio and started looking for the BEST storage ideas to suit my needs. I found solutions for most things, but not for thread!!

I previously stored my thread in these boxes…..

…and it worked fairly well.

BUT over the years, I have added lots of different types of threads, all in their own shapes and sizes, and my box system was starting to get tedious.

PLUS the fact, when I was quilting my last quilt with lots of different threads, these boxes kept getting pushed off of the machine bed and making huge messes on the floor.

So, the hunt was on for a new system….

I started at Amazon, and searched for drawer systems designed for scrapbooking paper and supplies. Before long I landed on this one…..

I spent some time measuring the sizes needed and comparing to the dimensions given and became fairly sure that it would work for me.

It arrived in a few pieces…..

….but was quick work to put together.

The only mistake that I made was that I put both of the “locking casters” on the same side instead of one on each side, but that is a mistake that I can deal with!!!

I started moving my threads into the storage drawers……

…and quickly realized that I was going to need some sort of separation in the drawers or the threads would become messy really fast.

I looked at the box that it was shipped in and found the perfect solution…..

Let’s add cardboard dividers!!

I first figured out how far apart these dividers needed to be and then drew a template to work from……

I placed the drawer on top of the template and used the lines to direct where the hot glue needed to go…..

I would lay down a bead of glue and then stick the cardboard strip on top of it…..

When I switched to different sizes of spools, I re-did the calculation and changed the orientation of the spools…..

In less than an hour, my threads were stored……

….and I am one happy camper!!!

There are even two empty drawers so I can go shopping!!!

The unit sits neatly beside the bookcase and can easily be rolled to Julio (my sit-down Juki Longarm) or rolled a bit further to Juanita (my Juki QVP2200-mini).

And now I have 2 extra shelves for future storage…..definitely a Win-Win!!

I am still debating one thing….. the drawers are open to the air so I am thinking about making a slip cover to fit over the entire unit.

Do you think that is necessary?? I would love your opinion!!

Picking out furniture!!

The painter’s arrive on Monday morning and hopefully my expanded studio will be finished early next week. As the end has come closer, I really started thinking about how I wanted to arrange things and also make decisions about what furniture I wanted to add.

My first decision was about fabric storage. Previously my fabric has all been stored in plastic boxes which get HEAVY and, when I am working with many colors, REALLY messy. I knew that I wanted to have everything out on the shelves and easy to see (and get to)

After LOTS of searching online, and reading TONS of opinions, I have decided to go with Ikea Kallax shelves…..

…and have figured out that I have space for 2 sets of 5×5 shelves. From what I have read online, I can fold my fabrics to be 5 inches wide and get two columns of fabric into each cubicle.

Next was a way to store threads….. again I went to Ikea and decided on the Alex drawer system…..

I have some ideas about how to set the drawers up but will have to try it first before I tell you about it!!!

Finally, I wanted a new cutting table. Because I am taller, I really wanted something that could be 38 or 39 inches tall. Those are NOT easy to find. I had planned how to build one but knew that it was going to be difficult, time consuimg and fairly expensive to do!! My plan was for it to be 36″ x 60″. The first step was to buy a cutting mat that was the correct size……PROBLEM…..they don’t make them anymore!! I only found one online and it had horrible ratings!! I did find the Martelli mat and knew that it would be a good product, but it was only 30×60.

I took this as a sign that my cutting table should only be 30×60!!! When I started looking for cutting tables I ran across the idea of using a standing desk…..and magically, they are 30×60!!! I have ordered this one…..

It comes with very high ratings and, when I tried one in a local store, it seems to be very sturdy and steady. It can rise to over 40″ tall but can also be lowered if I ever want to work from my chair.

So now I wait…..and wait……and wait!!! Not really…… most of this should be in next week and I can finally get it all in place.

I can’t wait to get up there!!!