Earlier in the year I had been talking about the British Quilt List challenge that I participated in back in 2009..
I had posted thru May and my plan had been to post one a month for the rest of the year.
BUT…..I FORGOT!!!
So, here is the 12-inch quilt for June…..
Sadly, I don’t remember exactly how we made this block. but I am thinking that we sewed the “flap” strips together first and then inserted them into the seams of the backing fabric.
I do remember sewing the top flaps down heading one direction and the bottom flaps the other, and then picking a point somewhere in the middle to turn the flaps the othere direction.
It has wonderful dimension and, for me, the fabrics are perfect!!
It would be interesting to explore this technique further as I am SURE that lots of amazing quilts could come out of it…..
This was a fun quilt to make and I love hanging it in my bathroom in the Spring and Summer.
I used to think that all Sumac was poisonous but learned that the herb “Sumac” is edible!!
I came to this understanding when we were visiting in Turkey and our host said that we were going to eat Lahmajoun!! Michael and I were SO excited about this because we had seen Anthony Bourdain pontificate on the wonders of this treat and we had determined that we WOULD have it when we were in Turkey.
Lahmajoun is basically a flatbread (think thick pizza crust) with ground meat and vegetables pressed into the dough, as opposed to sitting on top of the crust like our pizzas.
Here are the creators of the magic…..
Once layered, it is popped into a stone-fired oven and comes out looking like this……
But, what does this have to do with Sumac??
To eat the slices, you sprinkle on a bit lemon juice, and top with fresh Sumac leaves. You then fold it in half and enjoy….
One funny story…. our hotel in Istanbul wouldn’t tell us where we could find Lamajoun because it was considered “peasant food”. A few days later we were on the tram that traversed the city and I looked out and saw a restaurant that was advertising Lamajoun. We got off at the NEXT stop and had lunch!!!
But……back to quilting!!!!
Since I had already cut my background pieces, there were only seven purple squares to cut…..
The first step was to create a Square-in-a-Square design using the purple squares and the background triangles.
It was simple work to add the triangles to each side of the square…..
….but now I had to trim it down to 2-inches!
To accomplish this, I used a water-based marker and drew some guide lines on my ruler….
Now I could line up the markings with the corners of the square…..
…and trim one side…..
Turn it around and square up the other side…..
Soon I had seven Square-in-square blocks…..
It didn’t take long to get the block sewn together…..
And now for the glamor shot!!!
(I was in a hurry this month, so no purple embellishments!!)
This was a fun block make and even more fun to recall the memories!!!
Do certain designs bring back fond memories for you??
Let’s start with an apology….for those of you who follow this blog, you probably got 2 or 3 notifications this morning!! There was a glitch in the post. I tried twice to correct it and then decided that I had to start from scratch!! In re-doing the post, I found a photo that had an error!! So….sorry for all of the emails!!
Yesterday I shared two of my favorite designs in this week’s FMQ challenge from Angela Walters. Today, I have two that I DIDN’T like and two that I DID!!
Let’s start with the NO designs….
The first one was a triangle design where some are filled in…..
My problem was that I could NOT figure out where to go next so that I didn’t get myself stuck. Plus, I was not that excited about the design even when I was looking at the one that Angela had quilted herself!
The second design started with a closed-in shape that will filled in with various filler designs….
This might be fun if I was filling a huge area but it didn’t appeal to me.
IF I did try it, I would probably pre-mark my sections so that I knew where I was headed next.
But there were two that I did like…..
Interestingly, the first one was triangles (again) but these seemed easier to place….
….although I see now that there is one parallelogram hiding with the triangles.
I chose to use a ruler for these lines and I really do like the look. It takes quite a bit of time to work so I would only use it in smaller areas.
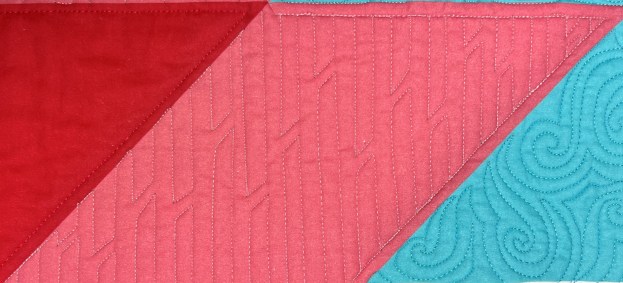
The last design is my favorite from this set. It is worked in the same manner as the “Back and Forth” design that looks like this…..
The difference is that the lines are further apart and the turns are angled rather than curved.
This was another design that Angela didn’t demonstrate, so I had to decide for myself how I was going to quilt it. Since it is similar to the above pattern, I worked it in the same manner, starting with a column of “columns”……
…..and then filling in the other side working my way back down the column…..
I really do like this design and think that it would be great in areas where I wanted straight lines, but maybe not COMPLETELY straight lines!!!
I also used a ruler for these lines which made it easier to keep the lines straight and meeting with the previous column.
So that is it for the geometric designs challenge.
Now I am a full two weeks behind but I am not going to try to catch up. Instead, I am going to take my time and try to learn as much as I can!!
Unfortunately, I didn’t have any on hand so we will have to make do with an internet photo!!
I liked the sparkle in the yellow fabric that I chose and even more so when I saw it paired with the background fabric….
It was a fairly easy block with a few flying geese blocks…..
….several “snowball” type blocks…..
….and a bit of careful sewing….
Actually, it was NOT so careful, so after some ripping out and resewing, I had a fun block…..
I participated in this challenge last year as well and my plan is to alternate the blocks from last year and this year to make a final quilt. It might look something like this…..
I can’t wait to get to the end of the year so that I can put all of the blocks together!!!
My guild issued a challenge earlier this year that was due at our meeting this past week. I never got around to making a quilt but was so impressed with the quilts that were shown.
The challenge was to use a Bears Paw Block, a realistic image of a bear and some form of embellishment!!
The Viewer’s Choice award went to Linda for her collaged bear….
If you are looking for the bears paw block, check out the bottom, right edge of the tree!!
Best use of an embellishment went to Rosie….
For embellishments, she did a big-stitch patch and used fmq for the bear image…
Best use of the Bear’s Paw block went to Jan for this quilt made for her grandson…..
Sue used collage for her Grizzly Bear…..
Pat went with crazy patchwork “teddy” bears…..
Mai had a photo of her mother feeding a bear at Yellowstone and she made three quilts featuring the photo….
Betsy made a sweet wallhanging with not only a Bears Paw block but an actual bears paw….
Finally, Laura used MINK for her bear……
Now I know that you are asking why she used Mink….. the daughter of one of her friends accidentally ran the coat thru the washer and dryer!! Needless to say, it was ruined but Laura found a way to resurrect a small part of it!!
I loved how varied all of these quilts were and the amazing creativity that went into each one.
As I viewed these bear paws, I was reminded of a quilt that I made for my daughter Jenny…..a LONG TIME AGO!!!