Making the quilt – Part 2

Yesterday I showed you the article that was my initial inspiration for the “Catherine Wheel of Color” quilt…..

During the day, I received a message from Abigail Dolinger…..the writer the of the article and designer of the “Pathways” quilt!!

I had a peek at her website and blog and you should really check it out!!! There is loads of great stuff there!!

But on with the quilt…..

When we left yesterday, it was at this stage….

While it looked nice, I had grown really fond of seeing the color wheel on point, so that meant adding corners!!

I did lots of mock-ups and finally came to the conclusion that I wanted it to look like this….

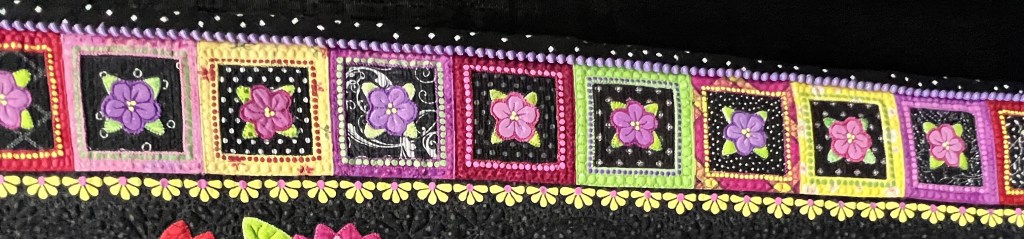
That meant making lots more circles and playing more with my yardage and the color wheel….

I also spent copious amounts of time doing geometry and trying to figure out the exact size of the triangles…..

But finally the circles were placed on the triangles and more applique ensued….

After a lot of squaring up (in my garage because that was the only place large enough to lay the top flat)…..

…. I was ready to think about quilting it!!

But then came another problem…..at that time, I only had my domestic Juki machine and I was fairly certain that I couldn’t quilt it there.

Then Julio (a Juki Sit-Down Longarm) entered my life….

While I loved quilting on the machine, I didn’t think that I was proficient enough to quilt this special quilt!!

After 2-1/2 years of practicing, I decided that I was indeed ready to quilt it…..

While quilting, I found that I truly enjoy quilting straight lines, and I found it quite relaxing to just sit and quilt!!

So in 2023…..four years after starting…..the quilt was finished, and as they say…..

“The Rest Is History”…..

Thanks for joining me on my walk down memory lane!!!

If you enjoy this blog, please share it with your friends!!!

Thank you…….

It’s a plan!!

Last week, I discussed the appliques (cut-outs) for my upcoming Holiday Inn quilt. To recap, I was finding it too hard to cut out the fabrics…..

….so I had pretty much decided that I would applique them on.

In my practice quilting sessions, I played with different ways to stitch the appliques in place.

These were definitely a no…..

These looked okay but I still wanted them to look like they were UNDER the top fabric….

THEN…..I took the workshop about Reverse Applique and…..voila…..the solution appeared!!

I WILL DO THEM AS REVERSE APPLIQUE!!!

As soon as I got home from the workshop, I pulled two fabrics and drew in the shapes….

…and sewed around them…..

I cut out the top fabrics

….and then turned it over and cut out the backing fabric….

I played with stitching extra lines around the shapes on the front…..

I am not sure how much extra stitching/quilting that I will add after the fabrics are cut out, but I feel sure that this will be the perfect solution to my issue!!

Now I just have to get more fabric and find time to work on it!!

.

……………………………………………………………………………………….

Do you have a stack of scraps that you want to use in a fun design?

Check out this pattern for a quick and easy scrap quilt that will help empty your bins and bring a smile to your face!!

Full Color pattern includes step by step instructions for blocks and border.

Click HERE for more information.

A Little Help for a Friend

On Friday my friend Ann came over asking for help with a project.

Brainstorming over ideas is one of my FAVORITE things to do, especially because I don’t have to actually DO any of the work!!

I was astounded as she brought out 13 gorgeous applique pieces…..

As I ogled at the intricate applique in each of the blocks, Ann told me that her mother had made most of them…..

….but she had finished up one or two herself…..

Aren’t they wonderful…..

When she first laid them out on the design wall, she had them all separated apart and was wondering what kind of sashing to use, thinking that she would turn it into a queen-size quilt.

This would mean that a large appliqued border would also be needed.

As we talked, I asked Ann if she was planning to use this on a bed and she immediately answered NO WAY!!

So why was she aiming for such a large quilt?

We started looking at photos of other Baltimore Album style quilts online and noticed that many did not have sashing at all.

SO….what would happen if we pushed them all together and turned them into a nice sized wall hanging?

At this point you could see the relief in her eyes that, if it was smaller, she might actually get it finished.

We finished up by talking about quilting ideas and both felt like some grid work was going to be needed.

Ann may get home and go back to the queen-sized idea but she at least left my house with a possible alternative!!

Lest you think that this advice was all one-sided, I showed her a project that I have taken on for a friend and Ann made some great suggestions about how to use a bunch of VERY DISPARATE blocks.

This synergy that happens when you brainstorm with others always amazes me….

What do you do when you get stuck on a project?

Is there a special friend that you brainstorm with?

If not, I would encourage you to find one….

…………………… IMMEDIATELY!!!

.

…………………………………………………………………………………………

Subscribe to my mailing list and receive this free pattern for “Dancing Squares”…..

You can sign up HERE……

A Bit of Applique

Since I seem to be working in alphabetical order, let’s look at the Applique category. I always find it interesting that both turned applique and raw-edge applique are included in the same category.

Regardless, here are a few of my favorites.

Since many applique quilts are filled with flowers, this one stood out as being different…..

“Toronto Architecture” by Keith Dommer

Note that each of those pieces are finished with a piped edge. That is a LOT of piping!!

There are so many wonderful touches in this next quilt….and I apologize that I failed to get the name of the maker. IF you recognize the quilt, please let me know the details so that I can add them here….

Not only is the applique impeccable, but the quilting adds a new dimension….

….and there are some sweet touches too…..

I am a sucker for daisies……

“Daisy Dots” by Lynne Taylor

Look at this fun border….

This quilt truly appealed to me….

“My Favorite Indigo Blue and KUMIKO” by Chiyoko Yoshimori

It is such an imaginative way to use bias binding!!

AND, it got me thinking about planning a hand applique with Celtic Applique or something similar!!

Isn’t this fun!!

“A Crowd of Strangers” by Jill Kerttula

The Third-Place quilt was one that truly caught my attention…..

“A Crowd of Strangers”by Jill Kerttula

There are SO many things about this quilt that were interesting, starting with the floor…..

….and continuing to the individuals in the view…..

The Second-Place ribbon went to…..

“Wild Rose” by Noriko Kido

It was exquisite in the piecing, applique, and quilting!!

The Winner of the Category was…..

“Coming Home” by Lyn Keogh

Again, the details were well done and the workmanship was exquisite!!

We met Lyn as she stood with her quilt and loved her interaction with several students who were asking questions about the quilt, particularly about her inspiration for the quilt…..

Lyn Keogh talks about the inspiration for her 1st place quilt

She was a kind and humble woman and we enjoyed talking with her.

So….that is the Applique Category……

Tomorrow I will tackle a special Exhibition called “Athletes”! Come back for some amazing quilts and an interview with their maker!!

.

…………………………………………..

If you don’t want to miss my personal tour of the International Quilt Festival in Houston, be sure to subscribe…….

Ocean background….

Last weekend I posted about learning to make the curved strips.

They were put together in a series of sets of 4 or 5 strips…..

When it was time to fuse these strips together, I knew that it was important to keep the strip sets straight. If they are angled in any way then sewing the straight lines together with cause the piece to be angled.

But how was I going to keep them straight!!!

Happily, I had an idea to use freezer paper on my ironing board to keep them straight…..

I first ironed a piece of freezer paper on the ironing board…..

…..and then drew parallel lines on the paper…..

Now I had a guide to use to keep the strips straight!!

I moved each strip set to the ironing board…..

…..and split it up into strips…..

I started with the one un-cut strip and placed it on the line…..

I then kept adding strips……

….making sure that the outside lines stayed straight.

Once I was happy with the lines, I removed the Wonder-Under strips…..

…..and ironed it all in place.

When I was finished, EACH strip set was perfectly straight…..

…..and ready to be sewed together!!

Come back tomorrow to see the finished quilt!!!

It is a cute one!!!


. . . . . . . . . . . . . . . . . . . . . . . . . . . . . . . . . . . . . . . . . . .

In this blog, I post stories about creativity, techniques, tools of the trade, and lots more about the wonderful art of quilting. If you are enjoying these posts, please subscribe to be notified of each new blog as it becomes available.