Early this year, our daughter Jenny and her husband Kevin announced that they were expecting their first child…..and OUR first grandchild!! Needless to say we were SO excited!!
And of course, my first thought was making a quilt.
When Jenny told me it was a boy and she was thinking about a jungle/safari theme, I knew EXACTLY what I wanted to make!!
You see, back in the early 1980’s we lived in Australia and there was a sweatshirt pattern in a magazine that I had clipped out to keep. Over the years I had purged many of these patterns but this one had stayed around……
I had actually made a version of it one time previously for Jenny’s best friend Emily…..
I was concerned about making the same quilt, but when I asked Jenny she assured me that she didn’t mind and would love it!!
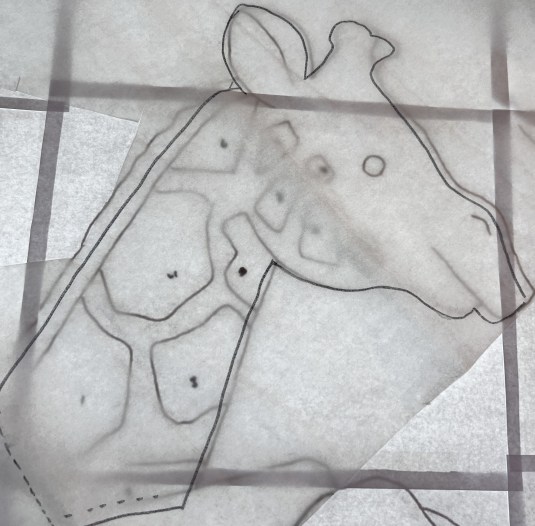
So, I printed out a full-size pattern……
….and started adding body parts……
I quickly had all of the animals ready to fuse…..
….but couldn’t decide what background to use…..
NO…..NOPE!!HAS POSSIBILITIES!!
Once I made a decision, I fused most of the animals down, added the inside border, and then fused the rest down…..
And, the final dark blue border was the perfect finish…..
I also wanted to put something special on the back so found a cute monkey on a coloring sheet and let him “hang around” on the back…..
I will leave it here for now and tomorrow will talk about the quilting process.
For the last several days, I have been posting about a baby quilt featuring 1950’s lambs!! Yesterday’s post, although lacking in photos brought it up to the quilting process.
NOW, THIS WAS WHAT I HAD BEEN WAITING FOR!!!
Could I use stitching to give the lamb some texture??
And the answer was……
….a resounding YES!!!!
I started out with swirls quilted with a cream thread, concentrating to make them larger in the body area and smaller on the legs and head.
I started to continue the swirls onto the tail but then decided that it needed something to make it more distinct so I switched to a different design….
After I had quilted the lamb, I decided that it needed an outline so went around again with a grey thread. That helped him to pop off of the background. I did choose not to outline the tail with grey and am happy that I didn’t because it gives that appendage a bit more dimension!!
The butterflies and ducks were quick and easy…..
…and for the flowers, I simply followed the fabric design!!
Now it was time to tackle the background!! After studying the top for a bit, I decided to quilt the meadow in a slanted wavy line that echoed the background piecing.
In the sky portion, I added some fluffy clouds and continued with the wavy lines, but this time they were horizontal across the top……
As I was working on the interior, my mind kept looking forward to the borders!! I had one idea of adding more flowers but I just wasn’t happy with that thought.
While I was procrastinating, I pulled out my I-Pad and started playing with the design in “ProCreate”. At that point, I thought about 1950’s decorating and realized that there would have been lace and trims and other decorations to “fancy” up the item.
This was the idea that came to my mind…..
What if I add quilting that gives a lacy looking design????
I started out using a small clam shell ruler and quilted all the way around the interior edge…..
Next, I drew a line a to mark the outside edge of the quilt and added clamshells there as well…..
Now, what was I going to put in between these two clamshell edges.
I played around with several rulers and finally decided that the “Elvira” ruler from Angela Walters could be used to make a wavy design down the middle of the border.
And, if I repeated the same design on the other side of the center line, I would get a quilted channel down the middle of the border.
To further highlight the scalloped edge and central design, I added dense quilting between the designs…..
I had been worried that the quilt might be too stiff, but once washed, it was soft and cuddly….just what a baby quilt should be!!!
The final step was adding a three-dimensional flower in the lambs mouth…..
It is EXTREMELY well sewn down so that there is no chance of it coming off!!
So, here is the final quilt…..
I am supremely happy with how it turned out and I can’t wait to meet the little girl that it will belong too!!!
I accidentally posted this early this week and now it doesn’t seem to be showing up properly on the CORRECT day, so here it is again…….
My husband Michael LOVES to read the works of Ernest Hemingway and has often talked about his practice of preparing for the next day’s work. He would always write the first sentence of the chapter that he was writing on the next day……ie….he “primed” the pump so that he was READY when he sat at the typewriter.
During this creative season, I have talked often about feeling overwhelmed with projects…”works in progress” as well as “want to do”, and “have to do” projects. And, often the hardest part is deciding which to do first!!
As I am writing this, I am heading to a week-long quilting retreat and have picked a simple scrap project to work on while there. That way I can enjoy the sewing process while still able to enjoy the conversations and women that I will share the time with.
However, in following Heminway’s suggestion, I have already made preparations for my next project which will be started when I return!!