Applique Background

I have been thinking about the background for my floral appliqué and finally decided to try painting one.

After covering my husband’s work bench…..

…. I had a look at my green paints…..

…and decided to start with a Moss Green….

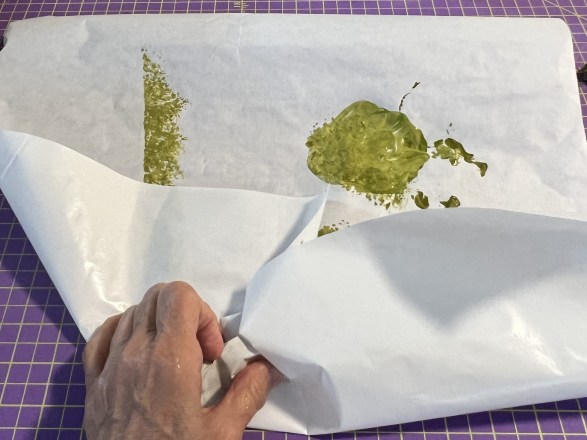
I added a fair amount of water to the lumpy paint and started brushing it onto the fabric with a foam brush…

You can see the spot that I started in because it is WAY too dark, but I will deliberately cover it up with a clump of flowers!!

After covering the bottom of the background, I added a darker green to the leftover Moss green, and added more brushstrokes….

I truly like the “streaks” of color!!

After cleaning the plastic, I turned the fabric around and started thinking about the sky portion. I started out with a blue, added water, then some white paint, and more white paint, until I found a color I was happy with…

For the sky, I didn’t want to paint streaks, so I decided to use a sea sponge instead…

At this point, I am liking the mottled sky!!

I decided to deepen the blue a bit, but unfortunately didn’t incorporate the paint well, so I ended up with dark blue dots…

You can see them a bit in this photo.

I then decided to go with solid white and create some “clouds” to hide some of the dots. After I held it up…..

… I realized it needed darker areas at the bottom, so I added some brown to the small amount of Moss Green left over and added additional brush strokes.

This was how it looked the next morning after it had dried, toning the colors down a bit….

To finish it off, I ironed it well, then washed it, hoping to restore the fabric’s soft hand..

It is still a little stiffer than regular fabric, and I will have to see if I can sew easily thru it.

I’ll let you know!!

…………………………………………………………………………………………

Subscribe to my mailing list and receive this free pattern for “Dancing Squares”…..

You can sign up HERE……

Freezer Paper to the Rescue

Don’t you hate it when you need to paint one little piece of fabric but you don’t want to have to put down plastic and get out all of the paint trays…. and the palettes….. and the brushes…. and everything else? 

Try this next time!!

Grab a piece of freezer paper and cover your table with it.

Because it has a waxy surface on the back, no liquids are going to travel through the paper to the table…..

You can even use the paper to mix your paint, meaning that you don’t have to clean a palette after you’re done…..

For most of my botanical painting, I prefer to use a sea sponge, and yes, I have a FAVORITE one!!

Just dip the sponge in the paint palette a few times on the paper…..

And then paint the fabric….

The best thing about this is when you were done, you scrunch it up…..

roll it all into a ball…..

…and throw it away!!

So next time, skip the plastic and head for the freezer paper 

………………………………………………………………………………………………………

On Tuesdays, I provide a tip, technique, or product review. Please subscribe to the blog to ensure that you don’t miss ANY of them!!

More surface design

When I left you, the Botero-inspired piece was at this point….

Now it was time to wash out the stabilizer. This was accomplished by soaking the piece in several baths of soapy water and then rinsing well.

Next, I headed to my “painting studio”…..ie my garage….. to play with the background fabric. Since I am NOT a painter, I always video the painting process to show you that you don’t have to be a painter to work on fabric. I hope that you enjoy the video……

BUT, after I turned the camera off and added the thread-painted cheesecloth to the background, it was apparent that the sky was too light in color.

VERY BIG SIGH!!!!

So, even though I loved the pale, pretty sky, I mixed up some more paint…..

…and proceeded to darken it.

It does look better now…..

Although the paint hasn’t dried in this photo, so I may have to go even a bit darker….time will tell!!

So far I am still enjoying this process and am pleased with how the piece looks.

Come back for more as I start to add flowers and more specialty yarns and….who knows what else!!

Sadie’s Background….Iteration #4.5!!

Well, after 4 tries, I think that I am finally happy with the background for the Saddle-Billed Stork collage.

Yesterday, I posted about painting this background……

As I looked further at it, I realized that I wanted to add a bit more shading to the two blue-green areas and also some more definition to the meadow in the foreground.

I decided that the best way to fix the meadow was using my trusty sea sponge and made a video to show you the process. If you have never worked with sponge painting, it is fun, easy, and adds SO much texture to the painting….

This is the final view…..

I am not super happy with the dark blue/green on the top left, but I think that I can work on it more with the quilting.

However, I AM super happy with the meadow area…..

It is going to be so much fun to add threads, thin pieces of fabric, and other yarns to make this area stand out.

Stay tuned for LOTS more!!!

Painting the meadow

Yesterday was painting day….YEAH!!!

Before I started painting, I added a few more couched yarns to the top……

I was pretty nervous about applying the paint but once I had my dyeing apron on…..

…..I knew that I could do it!!!

I mixed up the two paints that I needed, adding quite a bit of water so that they were really thin…..

I also sprayed water over the top of the fiber art before I started painting. To apply the paint, I used three makeup sponges that were stuck together…..

Starting at the top, I began sponging blue paint…..

Then I moved to the green, using paper towels to blot up any excess paint…..

This is one of the interim looks for the piece…..

I kept on going, mingling the blue and green so that it didn’t look so much like a line between sky and meadow. I also mixed in some darker green, adding some highlights.

When I was finished with the actual painting, I added a few more details….. the daisies were lightly rubbed with a blue metallic paint…..

…..and a few darker highlights were added with a copper paint…..

This was the final result of the painting session……

I am quite pleased with it, especially liking the white highlights in the sky and the dark couched yarns.

Now I am off to learn about free-motion embroidery of the flower elements…..or maybe I will just leave it as it is!!!!