Tomorrow I am heading off for a 4.5-day quilting retreat….YEA!!!
But, you have no idea how much pressure this puts on me!!
I simply can’t figure out what I want to work on during those days. I have a baby quilt to make and am organized for that, but it shouldn’t take more than a few hours. So WHAT am I going to do for the other 4 days??
I have a large box of 2.5-inch scraps and another one of 2.5×4.5-inch scraps and I really want to do something with them.
So I have been planning…..and planning…..and planning!!
I am planning to work with darks, mediums and lights so I designed TONS of blocks using those three colors…….
Then I started putting the blocks together in twos, looking for special patterns. This is one of the FIFTY-THREE quilts that I have designed…..
Thank heavens for Electric Quilt!!
After lots of playing, I have settled on these two blocks……
…..in this layout……
…..adding in red patches to give it some consistency…..
As I have mentioned before, Michael and I are heading back to Mozambique on Thursday and will be in camp for 2 more weeks. We are getting excited about returning to the friends that we made back in May!!
On previous trips, I have always taken some sort of creative project with me, but as we went on more and more trips, I realized that I seldom had time to work on them. So, I didn’t take ANYTHING on the trip earlier this summer. But, the weather was not conducive to being out and about and I ended up desperately wanting something to work on!!
So, I am NOT leaving this time without something to keep my hands busy!!
The question was exactly what to take??? Lighting is not great so I knew that I couldn’t take any fine work like applique.
As I scratched my brain trying to come up with an idea, my mind kept coming back to Indian Kantha cloth, like the covering for this box…..
I also kept remembering the amazing wall art that I saw in the Mumbai airport….
Click HERE to read more about the Mumbai Airport “art gallery”!!!
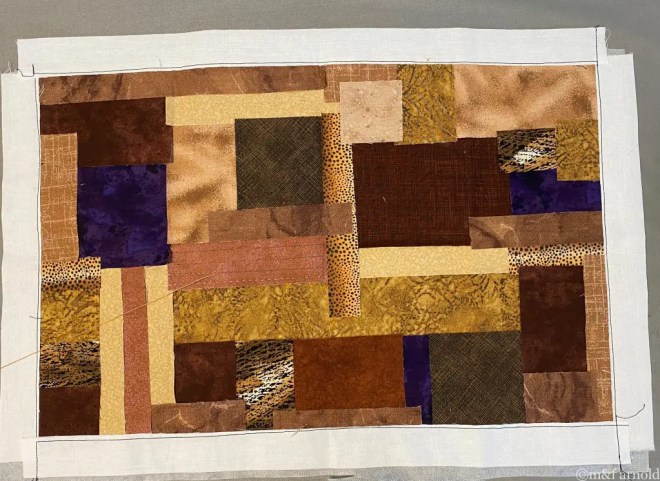
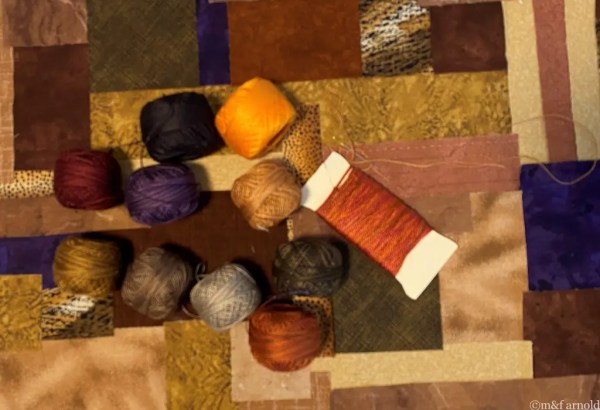
After procrastinating as long as I could, I finally pulled some fabrics and threads……
Add started cutting squares, strips, and rectangles……
I finally moved the design to lightweight fusible interfacing and, when I was happy with the design, I ironed it all in place. I glued down any strips or pieces that weren’t being held in place with the fusing.
Then I started worrying about how the edges would handle all of the manipulation, so I sewed strips of fabric over the top to give it some stability…..
You can see the first little bit of stitching that I did to see how it was going to work….
When I put everything together I started to get excited about this project…..it might actually work!!!
The final step was to put together all of the supplies that I would need, including needles, threaders, scissors (ones that go on a plane), a seam ripper, marking pen and a few straight pins….
I also needed a straight edge to use for marking the sewing lines and my ruler wouldn’t fit in my pencil case holder so I decided to make one. I cut a rectangle of template plastic and marked 1/4 lines along it’s length….
The final addition to the project bag was my clip on light…..
Now my bag is packed…..I’m ready to go……
I probably wont even open it on the trip, but at least it is there and available!!!!
Yesterday I wrote about the start of the crumb block quilt design phase. Today I have to actually put my thoughts together into a cohesive design!!!
The first decision was to have the geese move in a left to right direction so that you can follow them across the quilt. This also meant that the crumb block would float to different corners of the block…..
The black block was going to be in the center, but I wasn’t sure that I wanted to add flying geese to it so tried just putting borders around it…..
I liked that better, but it looked a bit bland, so I added a small strip of a multi-color fabric that I found on the shelf…..
…and really like the way it separated the black block from the others.
In the final piecing, I made the strip a bit wider and probably should have centered it better in the borders, but I am still happy with how it looks….
Let me say once again how pleased I am with having all of my fabric out so that I can see it at one time. I would NEVER have remembered this multi-color fabric as it would have been in a completely different box!!!
My plan was to go up the next day and pick some borders but, the more that I looked at the quilt, I didn’t want to add anything else to it. So this top is FINISHED!!!
I really like this layout design and can see where it would work with almost any 8 inch block. I am looking forward to doing some more playing with it!!
A few weeks back, I posted about making crumb blocks and showed three that I had finished. A few days later I finished 6 more so ended up with 9 finished blocks……
They were luscious but now the question was “what to do with them”!!!
My first decision was to finish each block with a one inch black border….
I kept thinking about flying geese and decided to experiment on the green block. This was my first attempt…..
Nope….the back polka dot is TOO much!!!
Second attempt……
No again….the grey is too bland!!!
How about a mottled black…..
Okay, I like that…..let’s try another one…..
YES…..we have a winner!!
I spent the next few hours at the machine madly sewing flying geese. I do love when the pieces back up behind the needle…..
….except when I realize that I ran out of bobbin thread ELEVEN geese ago!!!!
I did make one other decision about the black block…..
I felt that the white was too prominent but rather than re-piecing it, I simply got out a grey Fabrico marker and toned down the whites…..
It isn’t greatly different but I think that it is better.