On the Edge of my comfort zone

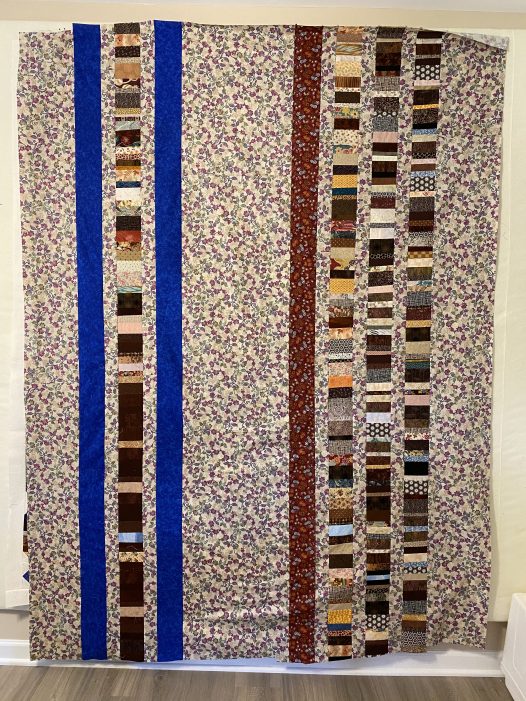
As I mentioned in Monday’s post, I am working on several projects that are WAY out of my comfort zone.

This is the first!!

It started with this inspiration photo that I shared a few weeks ago…..

Often I have no intention of making a quilt from the inspiration, but this one got stuck in my brain!

Also on my mind was this box of hand-dyed strips…..

These came from my friend, Anita, after she had closed her dyed-fabric business. They were the bits left over from cutting fat-quarters and other sizes of fabrics.

I just couldn’t shake the “what would happen if” thoughts!!

So, with a few hours in my studio, I grabbed the box of fabrics and started piecing dark blue fabrics into strip sets…..

….that were a bit over 6.5-inches in deep and at least 8-inches wide.

I then used my Deb Tucker Ruler (Wedge Star)….

….and cut a triangle out of the center of the strip……

I took the two extra bits and evened up the straight edge…..

I was then able to sew two triangles together….

….ending up with another big triangle (this photo was before I trimmed it down with the ruler)……

So now I have TONS of strip-filled triangles…..

What can I do with them??

Come back tomorrow and let’s play!!

.

A little more piecing

Yesterday I showed the small amount of curved piecing I found time for. Now, let’s look at a little more piecing!!

Lately, I have been thinking about doing some strip-piecing, but I am thinking about TINY strips…..like some that I saw at QuiltCon.

It didn’t take long to cut a few scrap strips of fabric and make a 4-inch set…..

Since it is 4-inches, that gives you an idea of how small some of the strips are!!!

I trimmed it into a square…..

….and stood back to look at my work!!

But then the “what-ifs” took over and I took it one step further…..

Okay….that’s interesting!!

So now I have these squares to play with….

(Too bad didn’t make them the same sizes!!!!)

But WHAT am I going to do with them!!!

Come back on Thursday and I will show some of the ideas that I came up with!!

. . . . . . . . . . . . . . . . . . . . . . . . . . . . . . . . . . . . . . . . . . .

In this blog, I post stories about creativity, techniques, tools of the trade, and lots more about the wonderful art of quilting. If you are enjoying these posts, please subscribe to be notified of each new blog as it becomes available.

Straight Strip Sets…..

Say that 3 times fast….. STRAIGHT…..STRIP…..SETS!!

Not only is it a tongue twister, but it can be an issue when you are creating a Bargello quilt…..

….and that is what I have been doing this past week. The quilt is due at tonight’s quilt guild meeting and, amazingly, I had it finished FOUR days ago. That is probably a record for me with Challenge Quilts!!

I will talk more about the design process on Thursday and thru the week, but today I wanted to show how I sew and iron my strip sets to ensure that they are even and that the seams are straight.

As I sewed, I put together this video to show you the process.

Be sure to come back on Thursday when I will talk about the design considerations in this Bargello Challenge!!


. . . . . . . . . . . . . . . . . . . . . . . . . . . . . . . . . . . . . . . . . . .

In this blog, I post stories about creativity, techniques, tools of the trade, and lots more about the wonderful art of quilting. If you are enjoying these posts, please subscribe to be notified of each new blog as it becomes available.

Tradewinds – Part 2

Yesterday I posted about making the Strip sets for my newest project….”Tradewinds”!!

Now it was time to sub-cut them into triangles.

The pattern uses a special ruler called the “Strip Tube Ruler”…..

One of the things that I appreciated about the pattern was that they included instructions for how to make the sub-cuts using a different type of ruler and this is what I did.

I used my “Easy Angle” ruler and simply put painter’s tape along the line that I would be following….

I actually put several layers of tape along that line…..

….so that I would have something to butt the fabric up against.

It worked beautifully!!!

For some of the cuts, I actually drew the lines on the ruler using a fine-point sharpie…..

I did try several different cutting lines until I got the size that yielded the proper triangle.

I also added smaller pieces of painter’s tape to help me see which line I was cutting on!!

This wasn’t an ideal way to do the cutting, but it was better than having to wait for another ruler to arrive.

As I started sewing the two triangle sets together, I marked the center of both blocks and used that to line up the pieces…..

It was enjoyable to quickly sew the triangles together to form the blocks……

…although twice I got a little carried away…..

It is SO frustrating to have to stop and rip when you are on a roll!!!

With all of the blocks made, I was excited to throw it up on the design wall and see how it looked…..

I wasn’t exactly sure about the layout but thought that I could go ahead and piece the big blocks together.

It was so exciting to see the corners and points match up …..

Isn’t that a thing of beauty!!!

Since every other block is rotated, I found it easiest to sew all of one type together first. Because I did it this way, I saved two or three blocks that I was about to sew incorrectly. I would notice that I wasn’t having to match up the same lines as before and that would be my “twig” that I was doing it wrong.

On the wall again…..

And, although I love the bright colors, I think that it needs something else…..

Come back Saturday for the big finish!!

Brown Strip Quilt gets a back….

As I started cleaning up my leftovers from the Brown Strip quilt, I realized that I had TONS and TONS and TONS of strips that I had cut and never used…..

I knew that they would just languish in the scrap drawer so I took things into my own hands and started piecing them together to make FOUR strips that would fit end-to-end on the back. I added some other solid strips and ended up with this as a back…..

I was running out of the main fabric and was getting desperate as I finished the last outside strip. I ended up piecing FOUR 2.5 inch strips together to make it long enough…..

Count them….FOUR seams!!!

Now….what can I start next to avoid having to think about quilting this!!!!