Jungle Frog….

It has been over a month since I posted a “Travel Log” quilt and the next one in line is a fun quilt that was also a guild challenge.

Let me give you the background……

In 2011, Michael and I spent 5 weeks in China while he lectured around the country. The final week was spent in the “Xishuangbanna Tropical Botanic Gardens”. This is a gorgeous place and I spent many fun hours taking photos of the flowers and foliage…..

We also returned there in 2018 and I had a marvelous time photographing the area. If you are interested…..

But…back to the quilt…..

Not long after we returned to the US, our guild issued a challenge to make a quilt that was 40-inches square, and had complimentary colors!!

I asked my scientist husband about his thoughts and he mentioned that there were some frogs that were green with red eyes. THAT sounded interesting, but I wasn’t sure that a 40-inch frog would do it!!

Then I started thinking about the photos that I had taken and began planning a jungle theme.

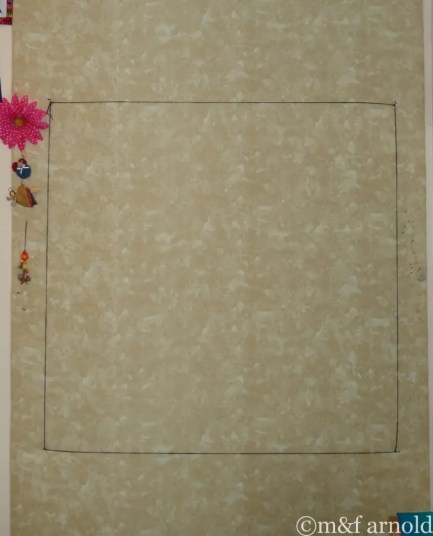
My first step was to clear off my design wall and mark out a 40-inch square…..

I then started printing out photos and outlines of jungle motifs. Some were from my photos and some from the internet, and the quilt started to grow….

At this point, I decided that there was more than enough to work with and I switched to fabric……

….and the quilt grew and grew…..

The frog was added…..

…and a red beaded flower….

I LOVED the final quilt…….

It is a SWEET reminder of a fun trip to the tropics of southern China!!

BQL – Fun Photo Block

For the last two Thursdays, I have been posting about my entries in the “British Quilt List” monthly challenge from back in 2009.

The March quilt started by picking out a favorite photo. In my case, I used one from a trip to Kew Gardens in 2007……

Step two was to print it out to a 4.5 x 6″ format. In my case, I added a small flange around the photo to bring it to the proper size and also to highlight the photo more…..

The final step was to pick out fifty-two 2-inch scrap squares and arrange them in a pleasing manner around the photo.

When pieced together, these squares made a wonderful accent to the photo……

I kept the quilting simple, following a “trip around the world” design.

The result was a fun “travel log quilt” that reminds me of a sweet day in London!!!

It’s Who You Travel With….

Back in 2016, my guild issued a Self-Portrait challenge that eventually turned into a Travel-Log Quilt.

The parameters of the challenge were that it had to….

  • be a self-portrait
  • have overall diameter of 80 inches
  • have a discernable patch of red

As I thought about who I was, I realized that I……..AM….A…..TRAVELER!!! And, I wanted the quilt to somehow represent that fact.

We had a photo that had been taken of us when we were in Italy in 2010, visiting the city of Gaeta. If you want to read about the day…..

One of the favorite things that Michael and I enjoy when we are traveling is to walk hand-in-hand and enjoy the sights. This is the inspiration photo…..

I started out by tinting the photo to Black & white and enhancing the red in my shirt…..

Next, I needed something to go around the photo, and a “Trip Around the World” block seemed appropriate…..

But, it wasn’t quite big enough so I needed to add a border……or two!!

I love this quote which has been attributed to many different people, but my favorite rendition of it is this…..

That saying proved to be the perfect finish to this fun quilt…..

Let’s travel some more….

For those of you who are new to my blog, I have been working in a series called “Travel Log Quilts”. These are art pieces that were based on places that Michael and I have traveled.

I had been consistently posting about them but realized that I had lost that thread….apparently almost a year ago!!! That is a long time with no travel!!

So, let’s get back to some trips ….starting in my favorite city of Rome!!

The story goes back to 2010 when Michael and I spent 2 months in Italy, with one month in an apartment in Rome!!

No, this wasn’t the apartment, but one of my favorite corners of the city!!!

But first, I have to return to the last guild meeting that I attended prior to the trip. At that meeting, it was announced that our next guild challenge was going to be based on our upcoming quilt show…..”Hot Threads, Cool Quilts”!! The quilt needed to follow the theme but had to have some sort of three-dimensional embellishments.

So, with that in mind, we arrived in Rome. We had two favorite pastimes in the city…..drinking espresso and eating gelato!!!

One very HOT and one very COOL…….

Say, wasn’t that the name of the challenge!!!

When I got home, I started playing with photos from the trip, tinting each one in either a warm tone or a cool tone.

I constructed a basic layout…..

….and started making a paper quilt, determining the needed size of the photos as I went…..

I still needed to add the embellishment. Wasn’t it good that I had collected gelato spoons as we ate our way thru Rome!!!…..

I heated a needle in a flame and poked a hole in the handle of each spoon and then sewed them loosely onto the bottom border…..

On the side borders, I quilted faux spoon shapes and considered the quilt finished, calling it “Hot Espresso, Cool Gelato”!!!

It is a fun memory of an amazing month in Rome!!

Sadie’s Background….Iteration #4.5!!

Well, after 4 tries, I think that I am finally happy with the background for the Saddle-Billed Stork collage.

Yesterday, I posted about painting this background……

As I looked further at it, I realized that I wanted to add a bit more shading to the two blue-green areas and also some more definition to the meadow in the foreground.

I decided that the best way to fix the meadow was using my trusty sea sponge and made a video to show you the process. If you have never worked with sponge painting, it is fun, easy, and adds SO much texture to the painting….

This is the final view…..

I am not super happy with the dark blue/green on the top left, but I think that I can work on it more with the quilting.

However, I AM super happy with the meadow area…..

It is going to be so much fun to add threads, thin pieces of fabric, and other yarns to make this area stand out.

Stay tuned for LOTS more!!!