Quilting without a plan!!

Yesterday I mentioned my dilemma about how to quilt my latest project. Since I couldn’t figure out exactly what to do, I started with a couple of simple things that I saw.

But where to go next???

I spent some time on Procreate, playing with various ideas……

….but none of them truly appealed to me. However, I did like PARTS of them!!

Firstly, I added the “petals” in part of the negative space…..

Then I added matching arcs to the outside of the pinwheel…..

Now, that made a really funky shape!!!

I then thought about quilting a circle around the pinwheel, but that didn’t turn out so well…..

The idea was good, but I didn’t have a ruler big enough to do the circle and it ended up being lumpy and bumpy, and out came the seam ripper!!!

I started looking at my rulers and realized that this one could be used to make a design that was ALMOST a circle…..

What if I use that arc and be sure to hit each of the points? THAT will work!!

But what to do next?

I found another of Angela’s new rulers…..

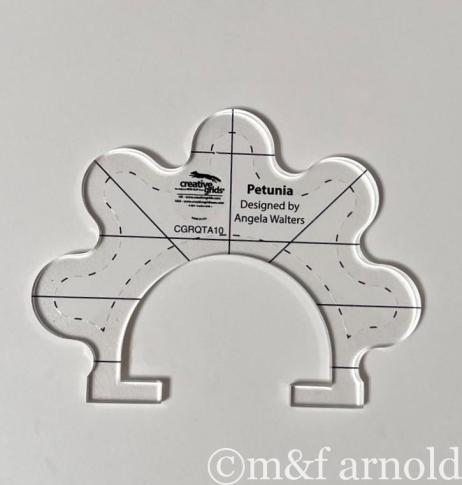
…and thought that it might be fun to add a flower design!!

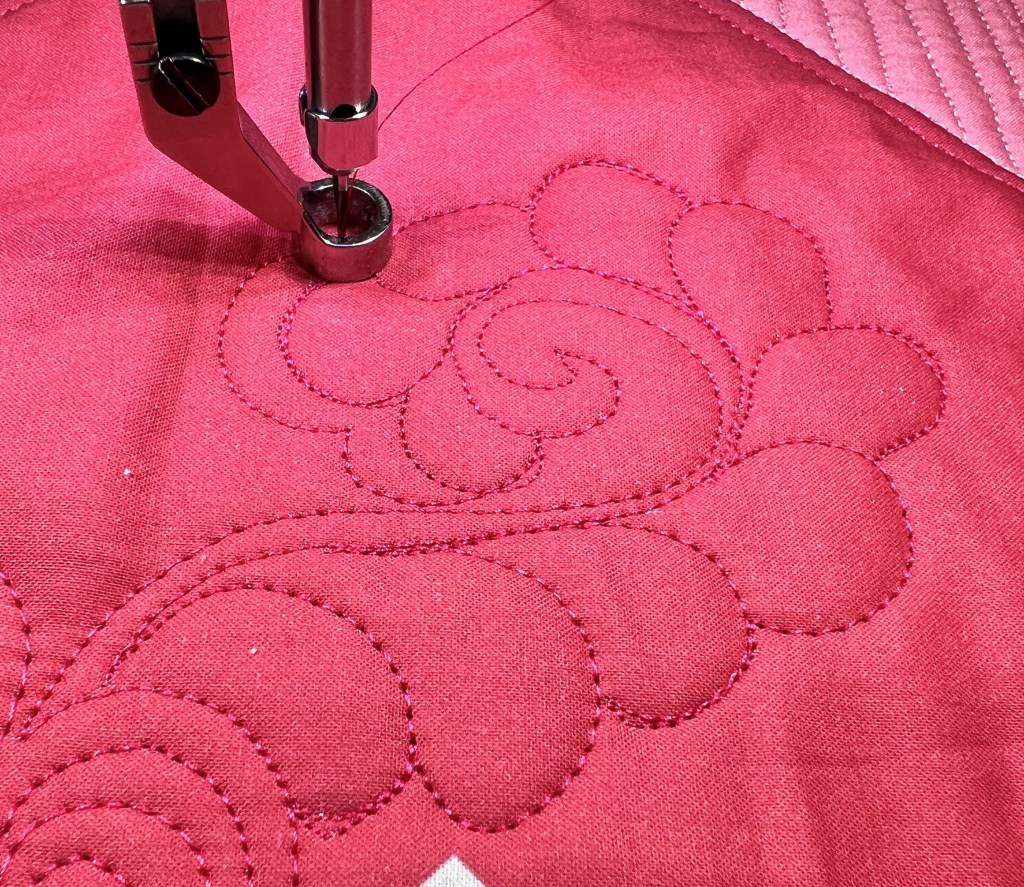
In the end, I used three different rulers to quilt each side of the pinwheel. First I used the arc ruler to quilt from one point down to the next…..

Then I used “Petunia” to quilt the next design, ending back up where I had started…..

I liked how this looked……

….but I knew that I needed a third line to bring me to a position where I could move forward to the next side. I solved this problem by adding another arc, using yet another ruler…..

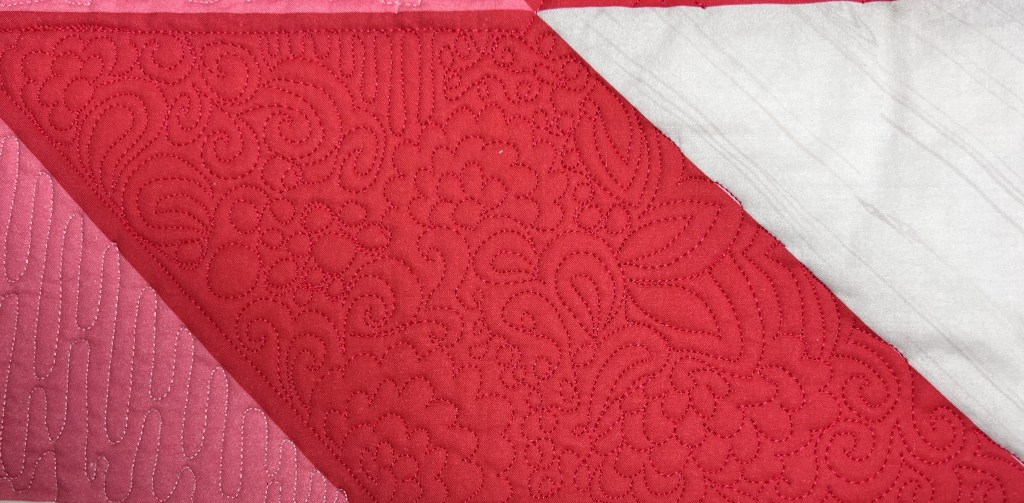
The final design looked like this…..

I am happy with how the quilting turned out and am pleased to say that every bit of the interior quilting was done using 5 rulers…..

For the two outside borders, I chose to use a couple of curvy line designs…..

Here is the finished quilt……

This has been a sweet project from inception to finish and it makes me happy to remember my new friends on the other side of the world!!!

THANKS LADIES!!!!

How am I going to quilt it?

Early this summer, I finished up the group quilt that I had done with several women from Australia and one from New Zealand.

Once I had resized a few of the blocks…..

…..it was quick work to put these brightly colored blocks together…..

…..and then add a fun border…..

But, HOW was I going to quilt it!!

Because I couldn’t answer that question, it languished in the “work-in-progress” bin for the past 3 months!!

Since I was afraid that it was going to turn into a fully-fledged UFO, I decided that it was TIME to get it quilted!!

When I can’t figure out how to quilt something, I try to start with the first thing that I see……in this case, the diagonals in the yellow, green, and orange squares…..

Then, I was pretty sure that I wanted to add some arcs in the pink pinwheels…..

I accomplished these using one of Angela Walters new rulers called “Smiley”…..

I used the longer and gentler curve to quilt the long hypotenuse line…..

….and the shorter, curvier side for the 90-degree sides…..

But, NOW I was stumped……

Come back tomorrow to see my decisions!!!

Even more FMQ

Yesterday I finished the 4th week of Angela Walter’s FMQ Filler challenge.

In the last post, I was expounding on the wonders of free-hand Clamshells….

The first pattern in this quilting session was a squared-off Clamshell…..

This was fun, but a bit boring. But, it got more interesting when I made the bricks in all different shapes and sizes…..

The next design that I tackled was a basketweave pattern that is based on a clamshell. The difference is that you travel up the previous shell and then move to the next one, giving it a woven appearance…..

I did okay with the larger shells but had issues when I tried to make them smaller and make them echo the previous shell. I would DEFINITELY need more practice on this one!!!

Next was a simple straight-lined design with random stars along the way. I used a ruler to help keep the lines straight although I am not sure that it was necessary…..

Last week I had put off this next design because I didn’t think that I could tackle it. It was a simple mixture of designs and I just wasn’t comfortable with it……

OF COURSE, it ended up being my favorite!!!

The final design for this week was a feather meander. The first feather wasn’t great…..

….but I finally remembered what I had learned in the last FMQ challenge and did a much better job on the next feather…..

I enjoyed working this design in a larger area…..

Even though I wasn’t looking forward to this week’s designs, I ended up loving most of them!!

There is one more set of designs left to try and I can’t wait to tackle them!!!

Help….I need a good name

Doesn’t it feel good to finish a project that has been years in the process??

YES, I finished this quilt last week…..

For those who may not remember, it was inspired by this photo….

I used “Electric Quilt” to design two blocks…..

I then played with them to come up with this design…..

When I received a bunch of gorgeous blue and green hand-dyed fabrics, I knew that it was time to start piecing!! The top has been ready for 18 months but it took this long to figure out how to quilt it!!

After readers gave tons of ideas, I decided on straight lines following the basic design of the triangles. That is a LOT of straight lines!! Let’s just say that I am now perfectly comfortable using a straight ruler for quilting!!

BUT WHAT WOULD I DO DIFFERENTLY????

I enjoy looking at each quilt and thinking about how I could make it better the next time, and for this quilt, there are TOO many lines of quilting. I like my general idea of having the large triangles run into each other…..

BUT, I should have had the spacing of the in-between lines be further apart!!

Live and learn!!

Having said that, I do like the look of the quilting, especially from this angle…..

I have written the pattern for this quilt but need a name before I can publish it.

PLEASE HELP……WHAT WOULD YOU NAME IT???


Shower curtain for the win!!

In the continuing saga of how to quilt my “woodpile” quilt, I posted on Tuesday that I had decided to start with some large triangles that would tie the 3 smaller triangle sets together…..

Now it was time to figure out how to tie the large triangles together. In order to try out a bunch of different ideas, I pinned the quilt to my design wall and covered it with a cheap clear, plastic shower curtain, making sure that it extended well beyond the edge of the quilt….

Using a water-soluble pen, I proceeded to draw all over the quilt, trying different design ideas as I went…..

When I was finished, I misted the shower curtain with water…..

….and cleaned it off with a paper towel…..

…..leaving me with a clean surface to start on all over again!!

I had used this system on small blocks but never on a whole quilt and it proved to be an amazing tool!!

And it only cost $1!!!!

Do you have any “unusual” tools that you use in your quilting studio??